You might be unfamiliar with ISO file, but have you downloaded games or applications from the Internet, you would find a lot coming in the form of an ISO image file. An ISO Image is simply an archived file containing a collection of the content from an optical disc and has been a very popular way of storing and distributing discs for some time. In most cases, to use an ISO file, you need to burn ISO to DVD.
Burning an ISO image to DVD is not hard once as you can find this function in general burning programs such as Nero or Burnaware. In this article, we will introduce you several methods to help you quickly burn ISO to DVD on .Windows or Mac.
There are two basic methods to burn an ISO image file to DVD on Windows. You can find professional ISO burner to help you burn IOS to DVD, or you can use the built-in Windows Disc Image Burner feature to burn iOS images to disc.
Finally Microsoft includes the ability to burn ISO images to Disk in Windows 7 so that you can use the built in Windows Disc Image Burner feature to burn ISO images to disc. The process is very straight-forward as below.
Step 1 Download the ISO CD image to a folder on your computer, and insert a blank CD in your CD-RW drive.
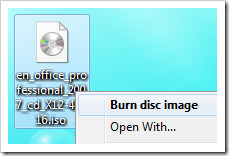
Step 2 Right click on the ISO image and choose Burn disc image.
Step 3 This will open up the Windows Disc Image Burner dialog box where you choose the CD or DVD drive. (You also check Verify disc after burning the click Burn)
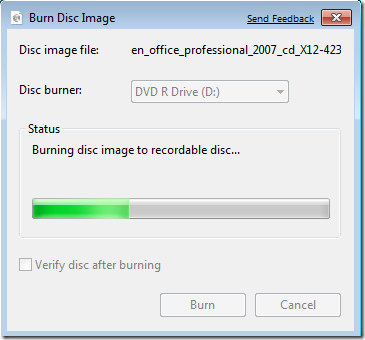
Step 4 While the disc is being created there is a progress bar indicating how long until it is finished.
When the burning process is done, you can see the ISO to DVD successfully.
It would be the best to burn ISO to DVD with a professional ISO to DVD burner. Here I highly recommend Aiseesoft's newest product, Burnova. This tool enables you to create DVD disc/folder/ISO file, or burn ISO file or DVD folder to DVD disc within simple steps. Now free download this program and follow the steps below to burn ISO to DVD.
Step 1 Insert a blank DVD disc to the ADVD drive if you want to burn ISO to DVD disc. Select "DVD Disc".
Step 2 Click "Add Media File(s)" to add your ISO image file to this DVD Burner.
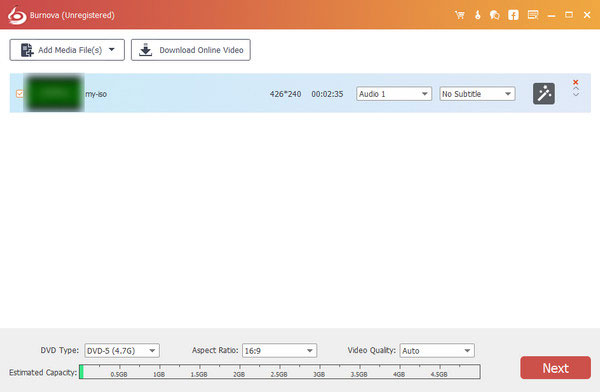
Step 3 You can click the edit button in the main interface to enhance the videos before burning ISO to DVD.
Step 4 Click "Next" to edit DVD menu.
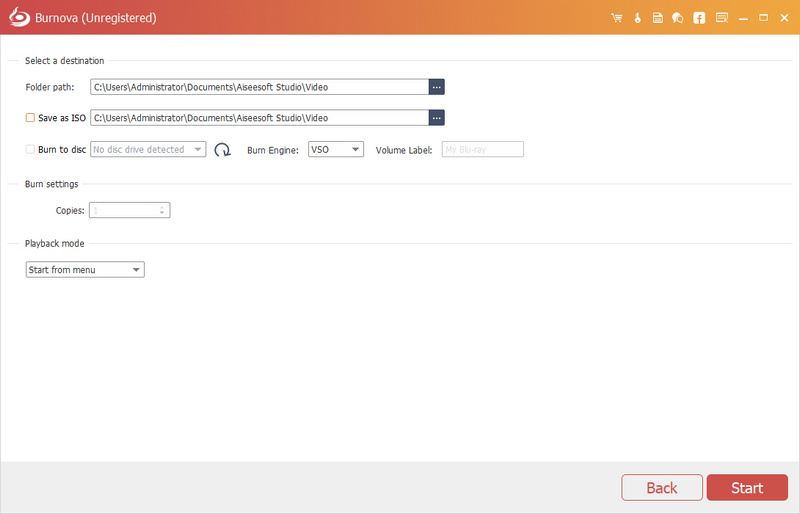
Step 5 Click "Next" to get the DVD burning settings
Here you can make the DVD settings as the following:
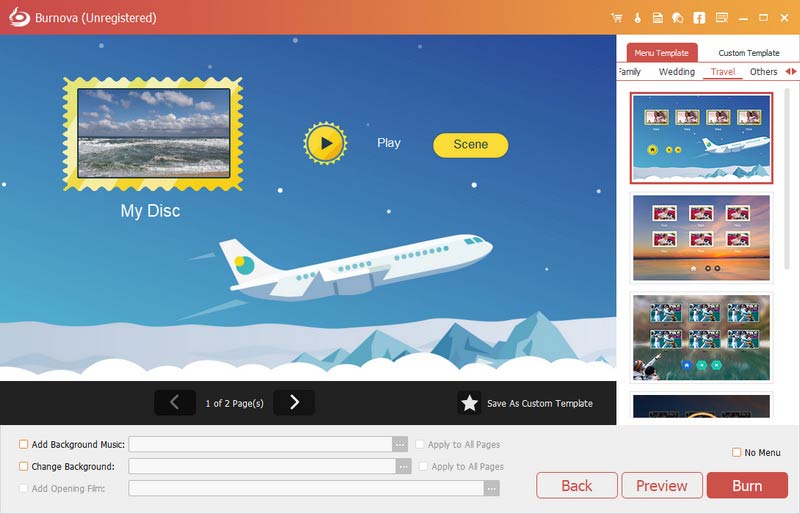
Step 6 After making all settings, click "Start" to burn ISO file to DVD.
As you can see, Burnova trys to help you burn ISO to DVD disc as easy as possible. To make you get better burning experience, you can also find other advanced features, such as video editing, DVD menu creating and more. Also, if you intend to create ISO file from DVD, this program may also help you. Want to learn more about burn ISO to DVD with Burnova? Download and explore on your own!
It is not as easy to burn ISO to DVD on windows as on Mac. Luckily, Mac also provides you a Disk Utility feature to help you burn iOS to DVD on Mac.
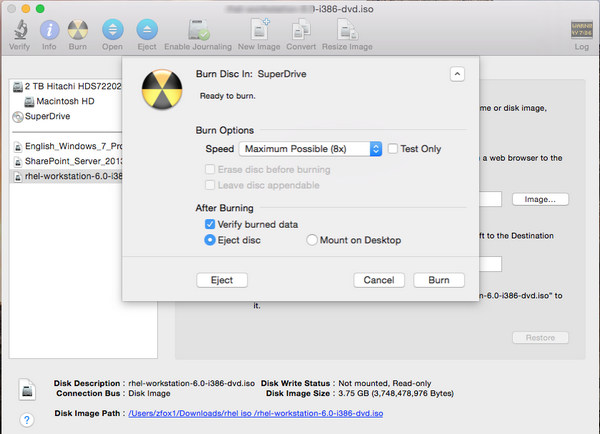
1. Insert a blank disc.
2. Start Disk Utility.
3. From the File menu, choose Open Disk Image and select the ISO to be burned.
4. In the list of volumes, you will now see an item representing the ISO file. Select it.
5. Click the Burn button and follow the instructions.

In this article, we have mainly introduced to you how to burn ISO to DVD on Windows/Mac. All in all, if you want to burn ISO to DVD on Mac, the built-in Disk Utility feature on Mac is enough. If you want to burn ISO to DVD on Windows, we highly recommend you to use a professional ISO to DVD burner like Burnova to help you. It may also give you a hand as ISO extractor from DVD if you want. Still have more questions about ISO to DVD? Feel free to leave your comments down below.