Clipchamp is a very commonly used online video editing tool, and it is also a Microsoft subsidiary. It is very suitable for some content creators, social media users, and some enterprise workers who usually need to create and edit videos. Famous for its simplicity of use, Clipchamp doesn't require users to have complex software or technical expertise, making it a popular choice for the masses.
Have you ever encountered this in your daily life? You really like the background music of a video and want to export the audio to listen to it. Or, when editing a video, you may need to export the audio tracks of some clips and adjust them to the right position. This is exactly when we need to extract the audio file out of a video. As a platform with a lot of basic editing features, can we use Clipchamp to export audio only? In what follows, we'll answer this question for you and give you specific steps to do so. If you still want to make changes to the exported audio tracks, you can also try the best helper we recommend.

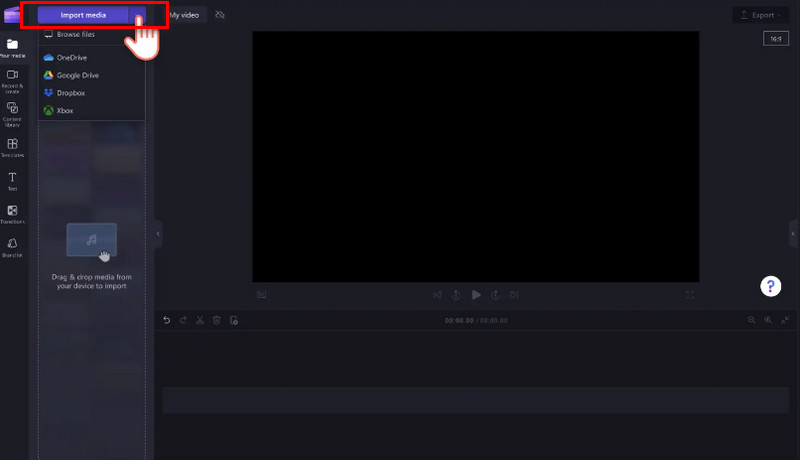
The first thing we need to know is whether Clipchamp supports exporting audio only. According to the information on its official platform, it currently only supports users to export video files in MP4 format. But don't worry; this just means that it doesn't provide the direct export feature. We can still download MP3 audio from a video to our computer by using the Remove Audio from Video feature. The steps to do this are simple.
Here is what you need to do to export audio from Clipchamp.
Thus, you have successfully exported audio with the help of Clipchamp.
you find the Clipchamp audio detach not working, try to restart the application or your system. Some small unexplained errors will be fixed in the process. Also, you need to ensure that you are using the latest version of Clipchamp; otherwise, you may encounter some issues. There is also a potential reason that the format of your video is not compatible with Clipchamp. Try converting your video to a more common format first.
Follow the steps above. We believe you have successfully exported the audio. Generally, Clipchamp will export music in MP3 format by default. If you need to convert it to other formats with higher sound quality or want to edit it carefully, consider using a professional video and audio converter. The recommendation we give is Aiseesoft Video Converter Ultimate. Currently, it supports more than 1,000 multimedia formats, which can cover almost all the kinds we see in our daily lives. In terms of conversion efficiency, after constant updating and iteration, its conversion speed has been enhanced to 120X faster than before. No matter how big your audio files are, you can get the converted files immediately. In addition to that, Video Converter Ultimate supports you in editing and enhancing the music, removing noise from the tracks, and adding fade-in or fade-out effects.
![]() 100% Secure. No Ads.
100% Secure. No Ads.
![]() 100% Secure. No Ads.
100% Secure. No Ads.
• Convert audio, video, and image files between 1,000+ formats.
• Applies hardware accelerating technology to ensure a 120X faster conversion speed.
• Offers various video and audio editing options as well as colorful filters and effects.
• Enhance video quality to 1080p or 4K with artificial intelligence.
• Compress audio or video files to a smaller size without total quality loss.
• Remove the watermark from videos with a few clicks.
• Create music videos with provided filters, themes, transitions, and effects.
Next, we will teach you how to convert Clipchamp exported audio to more formats.
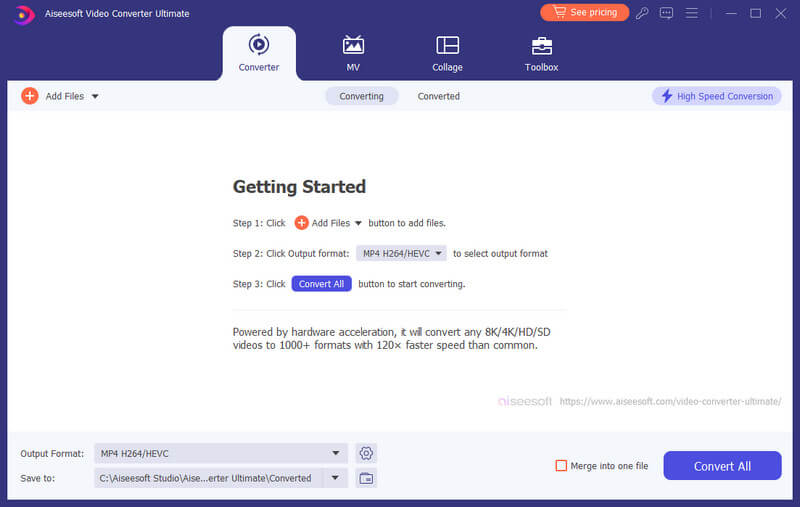

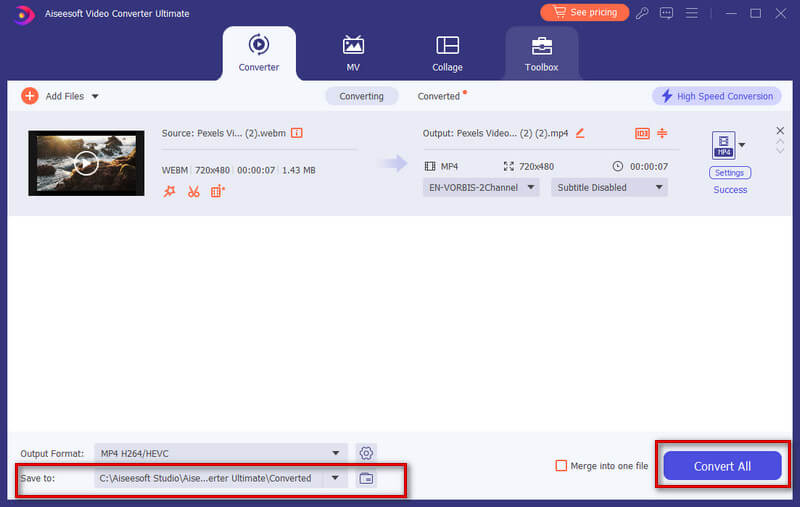
If you need to modify some parameters of your audio, you can click Edit or Cut on the conversion window.
• In the Edit window, you can adjust the volume and delay of your audio.
• In the Cut window, you will be allowed to trim the length of your video or audio. Video Converter Ultimate also offers the ability to quickly split your file into several fragments of equal length, thus facilitating subsequent processing. Additionally, you can add Fade-in or Fade-out effects to your music.
• In the toolbox of Video Converter Ultimate, you can find more audio edit tools, like Noise Remover and Audio Compressor.
How to record audio only in Clipchamp?
To record audio, you can add a simple image or a dummy video file to the Clipchamp timeline. Use a blank image or any placeholder video with no visual content. Then, position the play head at the beginning of the timeline and start recording the audio using your microphone or any external audio input device. When exporting, export the audio only.
How to export Clipchamp as MP3?
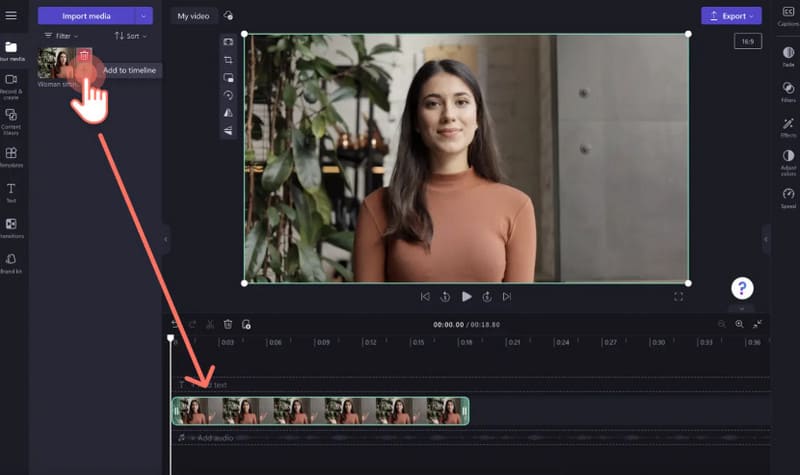
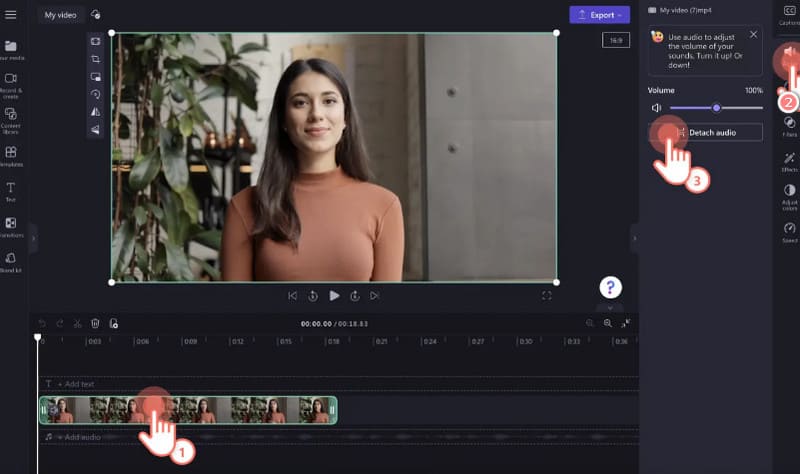
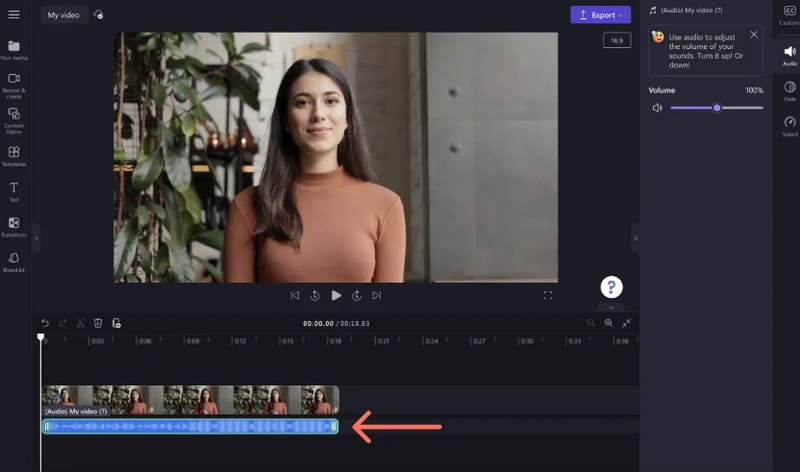
Once you have uploaded your video to Clipchamp and added it to the timeline, you can extract the audio track from the video file. To do this, choose your video and click audio > detach audio. The audio will appear on the timeline. And it will be downloaded to your device in MP3 format.
How do I delete a video but keep the audio in Clipchamp?
To do this, you need to separate audio from video and export the audio file. Add the video file to the Clipchamp platform and put it on the timeline. Right-click on the video clip, and choose Audio > Detach. The audio track will be saved to your browser's download folder.
Conclusion
In this article, we first analyze the feasibility of exporting audio only in Clipchamp for you and then guide you step by step through the process. For some users' conversion and editing needs when exporting audio, we recommend the top audio and video editing tool, Aiseesoft Video Converter Ultimate. Likewise, we have provided detailed instructions on how to use it. Hopefully, these contents will ensure that you can successfully export the audio files. If you have any other comments, please feel free to leave them in the comment section.
 How to Extract Audio from Video with High Quality (Free & Online)
Want to extract audio from video or convert video to audio? You can learn how to extract audio from MP4 video in this post.
 Top 3 Ways to Remove Audio from Video on Windows/Mac
Where can you find a video editing software to help you remove audio track from video? Fortunately, this article will introduce one reputable video tool.
 Audio Splitter - How to Cut MP3 with Audio Splitter on Windows/Mac
Want to find song cutter or MP3 trimmer? You can learn how to cut your MP3 songs with audio splitter in this post.
Video Converter Ultimate is excellent video converter, editor and enhancer to convert, enhance and edit videos and music in 1000 formats and more.
![]() 100% Secure. No Ads.
100% Secure. No Ads.
![]() 100% Secure. No Ads.
100% Secure. No Ads.