How to Safely Move Photo Library from Mac to External Hard Drive
I recently got an external hard drive. To save my Mac space and make it run faster, I want to move all my photos to external hard drive. It takes up almost 200gb of space. How can I move them to spare more space on my Mac.
Photo Library is home to all your photos, albums and slideshows. If you are trying to free up Mac storage, it is wise to transfer all your photos from MacBook to external hard drive. Luckily, this post will show you the latest solution to move photo library from Mac to external hard drive.
Part 1. 3 Easy Solutions to Copy Photos from Mac to External Hard Drive
Solution 1: Use Mac Cleaner - Best Method
Before transferring photos to external hard drive, you need to make sure the disk is formatted for APFS or Mac OS Extended. Otherwise, the disk cannot be recognized, nor the content cannot be modified by Mac.
Step 1.
Open Finder and select Pictures from the left panel. Locate and open iPhoto Library folder.
Step 2.
Open a new Finder window and locate the external hard drive folder. You can create a new folder to save photos.
Step 3.
Just drag and drop the iPhoto Library folder directly to the external hard drive.
It may take a while according to the photo amount. So, don't turn off your Mac or unplug the external hard drive.

If your Mac is running slow or out of storage, you may need to move the large photos to external hard drive. But there is another quick way to get more spare space on your Mac. What you need to do is to clear your Mac with Aiseesoft Mac Cleaner. It is a professional Mac management tool to remove junk files, clutter, duplicate photos, shred files and maintain Mac performance.

Downloads
Mac Cleaner
- Remove large and old files, duplicate photos, shred files and more.
- Preview the duplicate photos or files before deleting them on Mac.
- Monitor disk utilization, CPU, battery status and memory usage.
- Compatible with Mac, MacBook, MacBook Air/Pro, iMac, etc.
Solution 2: Use Drag-and-Drop - Simple Method
This method is simple for all users, especially for those who transfer with smaller collections.
Step 1.
Connect your external hard drive to the Mac.
Step 2.
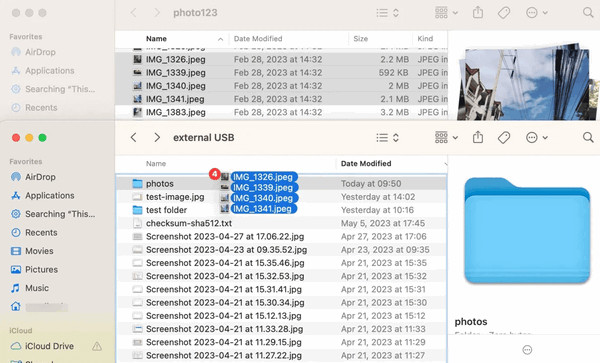
Find photos that you want to transfer from Mac’s folder. Usually, they’re stored in the Pictures folder in the user directory.
Step 3.
Launch Finder and create a folder on your external hard drive directory.
Step 4.
Drag and drop the photos you selected into the new folder you just created on your external drive.
Solution 3: Use Photos app - Detailed Method
You can also use the Photos app to copy photos on Mac to your external HDD, for it offers more detailed controls. Especially, this method is good for organized libraries.
1. Transfer photos to HDD one by one on Mac
Step 1.
Select a photo that you want to transfer from the Photos app after connecting the hard drive.
Step 2.
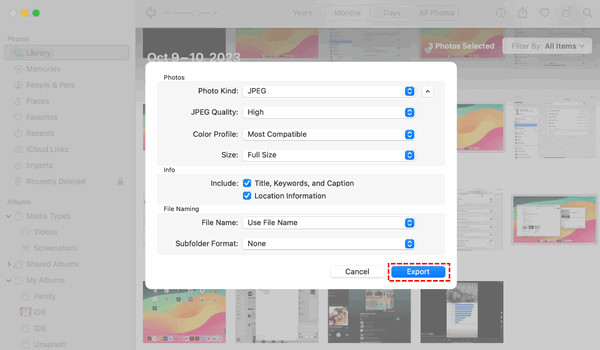
Click and go to File > Export > Export Photos.
Step 3.
From the new window, you can select output formats, image quality, color profile, etc.
Step 4.
Click Export button to start the transfer.
2. Move photos in batch on Mac
Step 1.
Turn on the Photos app and long hold the Command button to circle the photos that you want to move.
Step 2.
Click and go to File > Export > Export Album (or Export Library for the entire library).
Step 3.
Then, customize your output settings like the last section of this part.
Step 4.
Hit the Export button to transfer them to your target folder on your external hard drive.
Part 2. Tip: Recover Deleted Photos from an External Hard Drive on Mac
If you accidentally lost photos from external hard drive, you can still get them back. This may happen when you format an external hard drive. Don't worry. With the advantageous Aiseesoft Mac Data Recovery, you can get all the deleted or lost data back, including photos, documents, emails, videos, audio and more.

Downloads
Aiseesoft Mac Data Recovery
- Recover photos, documents, audio, video from external hard drive.
- Restore from hard drive, computer, memory card, digital camera, etc.
- Get photos back due to deletion, formation and other hard drive problem.
- It allows you to preview the deleted photos before recovering to Mac.
Step 1.
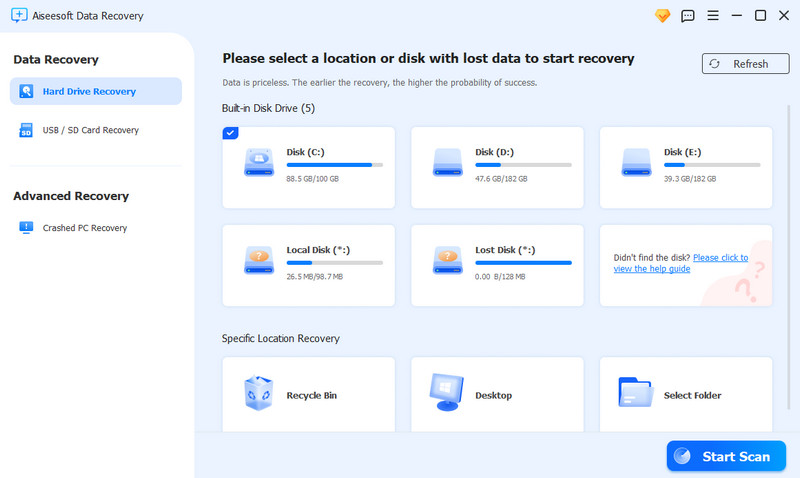
Free download this Mac photos recovery program. Install and run it on your Mac. If you are running macOS X EL Capitan or later, you need to
disable System Integrity Protection first.
Step 2.
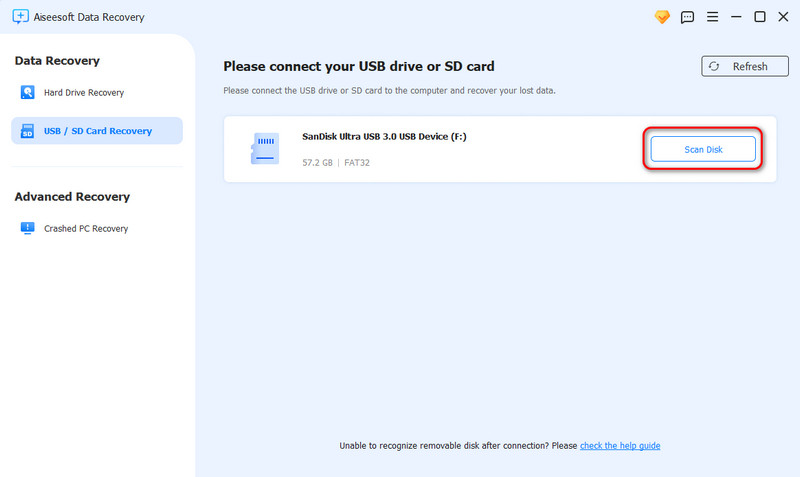
Connect the device to your Mac and choose the USB/SD Recovery section on the left in the main interface. Then, click the Scan Disk button.
Step 3.
When scanning finishes, you can preview all the data it detects. It will find deleted files like images, audio files, videos, emails, documents, and others. Use Filter feature to locate the image files you want to recover quickly.
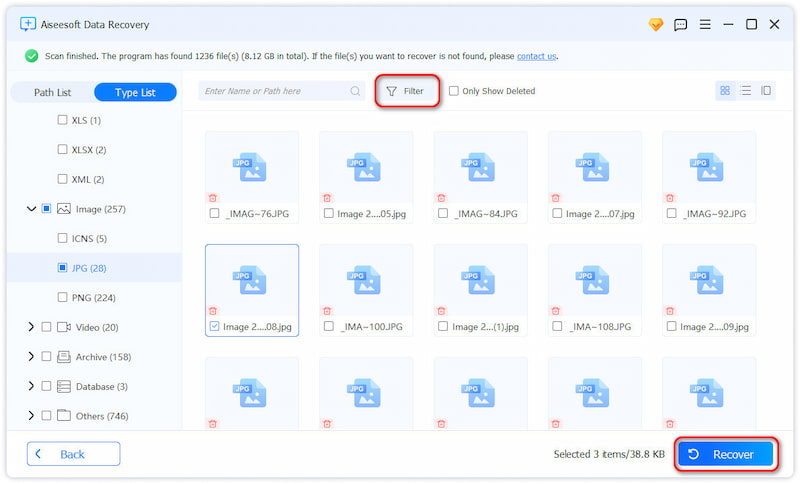
Step 4.
When you select all images you want to recover, hit the Recover button and launch the recovery in just one click.
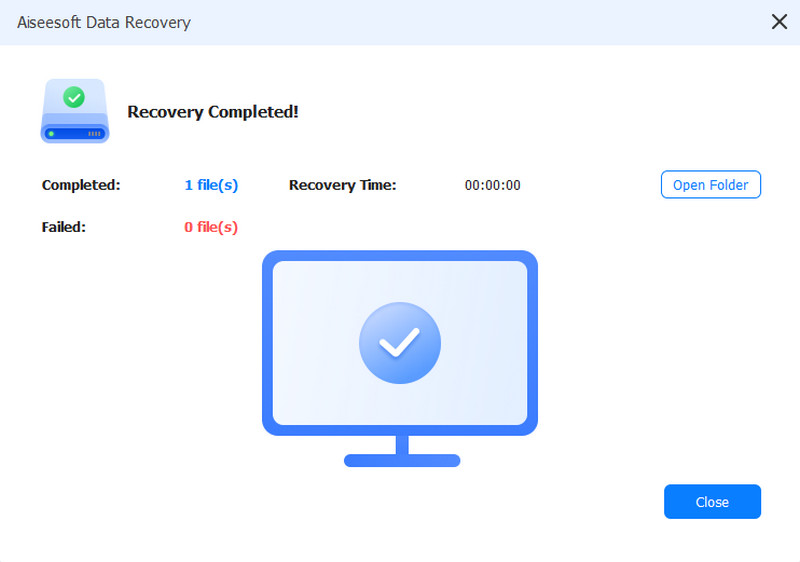
Conclusion
It seems easy to move photos from Mac to external hard drive with the method above. If you want to free up more space on your Mac, it is wise to choose Mac Cleaner to get the useless apps, duplicate photos, shred files away from your Mac. If you accidentally lost data due to hard drive formation, you can try Mac Data Recovery to get all your photos back.
What do you think of this post?
Excellent
Rating: 4.7 / 5 (based on 109 votes)Follow Us on
 Leave your comment and join our discussion


100% Secure. No Ads.


100% Secure. No Ads.
100% Secure. No Ads.


100% Secure. No Ads.