Have you ever examined your image and noticed that it has a value called DPI? Let's start with a quick overview of what this is. DPI is short for Dots Per Inch. It's a unit of measure that refers to the number of dots that can be printed per inch. DPI is one of the main parameters of the accuracy of a picture or printer, and in general, the higher the value of DPI, the higher the resolution and quality of the image. Therefore, if your picture is not clear enough, it is possible to fix it by changing its DPI value. In this article, we are going to explore this issue in detail. When we think of image editing tools, Photoshop comes to mind. It is the one that allows users to adjust the DPI of an image by changing the value. Here, let's learn how to change DPI in Photoshop together.
In the previous section, we mentioned that Photoshop can be used to change the DPI. Usually, we do this by changing the resolution, the width, and the height of the image. These values are proportional to the DPI. Next, let us learn how to apply it in detail.
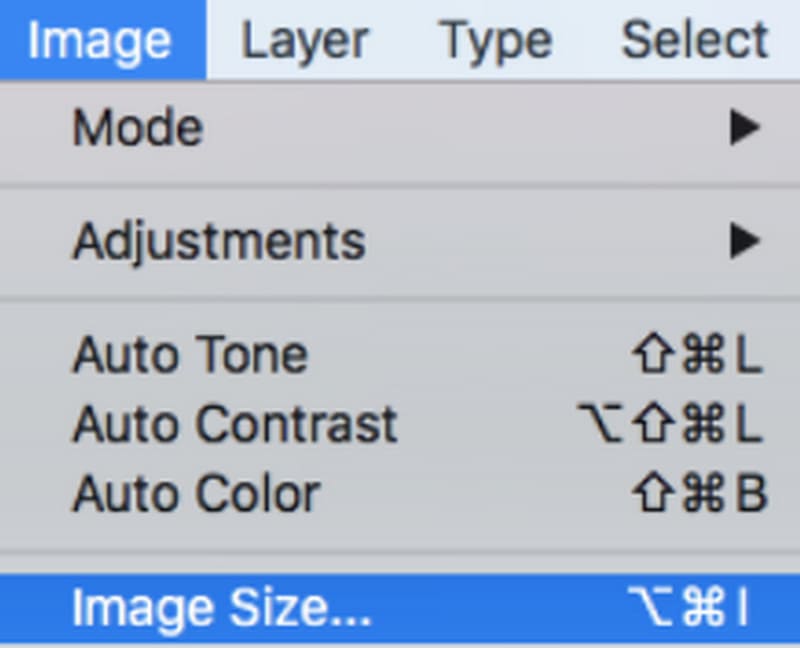
If you want to increase the DPI of an image, you have to adjust the resolution, width, and height to a larger number.
Here is a guide on how to increase DPI in Photoshop.
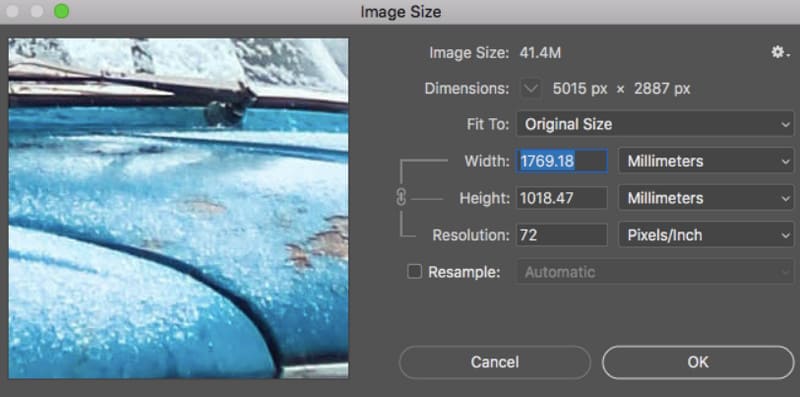
Now, you have finished changing the DPI of your image. Note that the dimensions of your image will also be changed during this process.
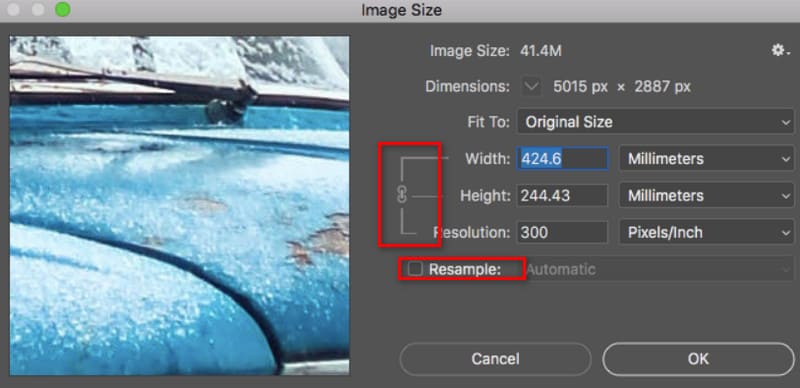
If you follow these steps to edit DPI in Photoshop, the size of your edited image may be changed. If you want to avoid image resizing while adjusting the DPI, you will have to make some additional adjustments. We will show you how to do this next.
After reading the previous section, we are sure you already know exactly what to do to adjust DPI in Photoshop. There are some additional tips that you may need to be aware of. We will list them below in the hope that we can help you solve the problem more comprehensively.
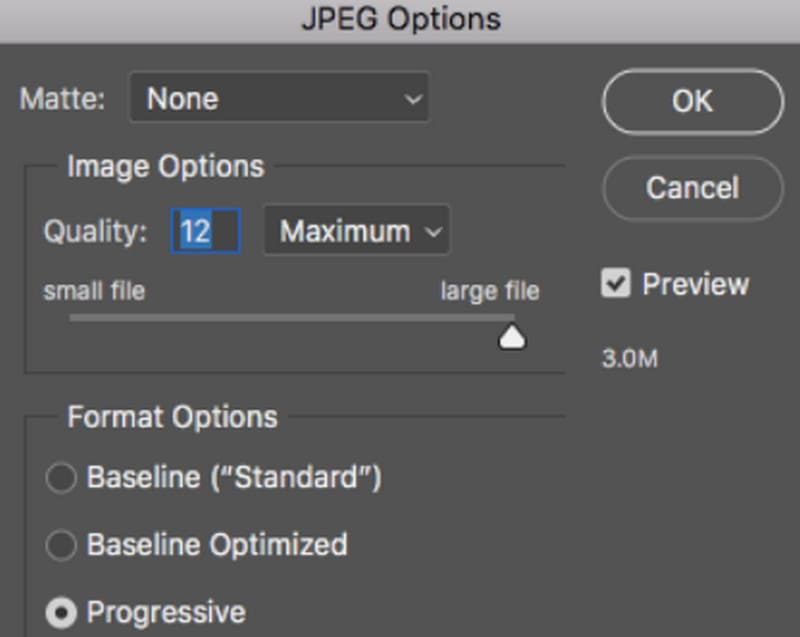
You also have the option of exporting your images directly at 300 DPI if using Photoshop for your images. This operation is not complicated.
Here is what you need to do to export 300 DPIs in Photoshop.
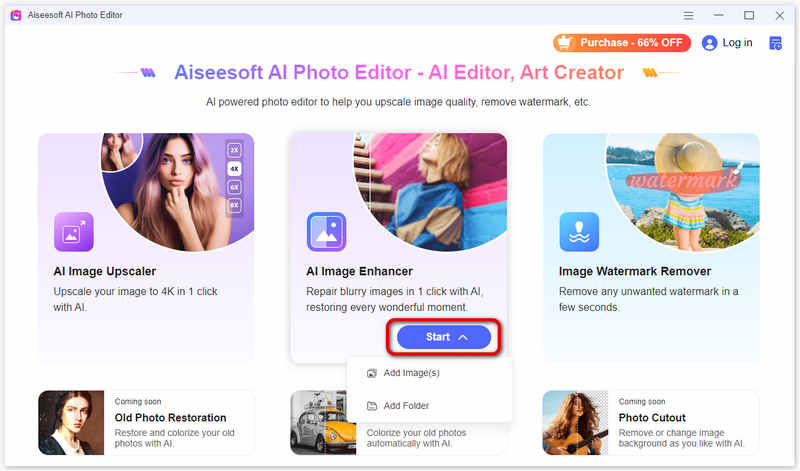
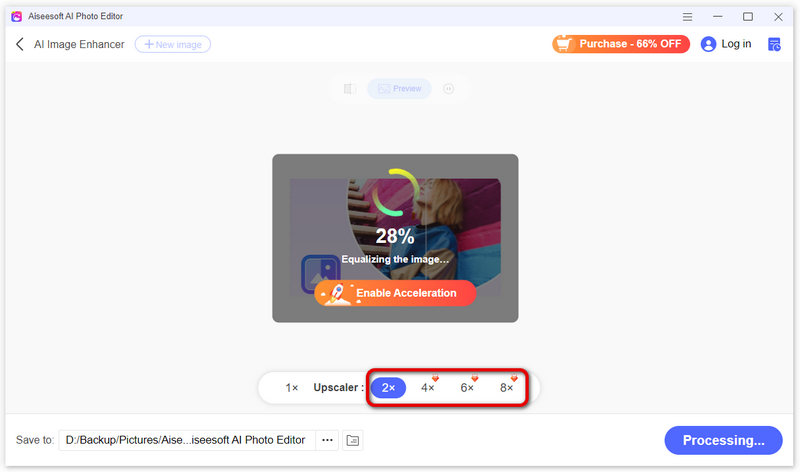
There is an easier way to change the DPI of an image than Photoshop, and we recommend that you try Aiseesoft AI Photo Editor, which is much simpler to use than Photoshop and doesn't require any specialized knowledge. It works by using AI technology to analyze your uploaded images and fix the blurry parts to make sure your photos look their best. You don't need to make any numerical adjustments manually during this process. The repaired image will be displayed directly, and you can even feel the marvel of AI technology by comparing the images before and after processing.
![]() 100% Secure. No Ads.
100% Secure. No Ads.
![]() 100% Secure. No Ads.
100% Secure. No Ads.
Here is a step-by-step guide to using Aiseesoft AI Photo Editor.
How does changing the DPI affect the image resolution?
Increasing the DPI of an image improves its resolution and image quality. Higher DPI means more dots (pixels) per inch, resulting in a clearer image when printed. If you do this without changing the pixel dimensions of an image, the physical print size will be reduced.
Is 300 DPI equal to 300 PPI?
When it comes to specifying the resolution of an image, saying 300 DPI or 300 PPI generally conveys the same information; that is, the image contains 300 pixels per inch when printed or displayed.
How can 70 DPI be changed to 300 DPI?
To change the DPI (dots per inch) of an image from 70 DPI to 300 DPI, you can use Photoshop or GIMP. With Photoshop, you just need to change the resolution value to 300 DPI in the Resolution box under the Image Size window.
Conclusion
In this article, we mainly tell you how to change the DPI in Photoshop. If you want to keep the size of your image the same throughout the process, we have the corresponding steps for your reference. In view of Photoshop's cumbersome operation steps, you can also try our recommended AI tool, Aiseesoft AI Photo Editor, to directly adjust the image DPI and resolution. We always have the solution you need.
 How Can We Change the DPI of Images - Offline & Online
Changing the DPI of your images can affect their sharpness. If you want to know how to do it, read our article. We will recommend you 5 practical methods.
 Get 7 Best Video to GIF Converters to Make GIFs from Videos
How can I turn an MP4 video into an animated GIF? Is there a free video to GIF converter? This post shares 7 best video to GIF creators, online and offline.
 How to Increase Image Resolution in Photoshop and Its Best Alternative
How to increase the resolution of an image on Photoshop? Is there an alternative method to upscale the image for free? Just learn more details about the topic from the article.

Enlarge and upscale images up to 4K in batches and remove image watermarks quickly for JPG, JPEG, BMP, PNG, etc.
![]() 100% Secure. No Ads.
100% Secure. No Ads.
![]() 100% Secure. No Ads.
100% Secure. No Ads.