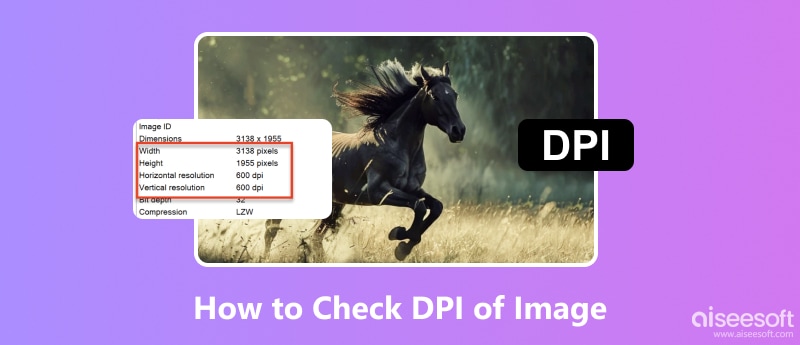
Do you know what DPI stands for? The full name of this word is Dots Per Inch. As a measurement used to quantify the resolution of printed images, DPI refers to the number of individual dots that can be placed within a one-inch square area. Generally speaking, the higher the DPI value of an image, the sharper it will be. That is, this image can show more details. Overall, understanding DPI is essential for ensuring that your printed images maintain their quality and clarity.
Currently, users can operate on their devices to check the DPI of images. In this article, we will provide you with specific step-by-step instructions from both Windows and Mac computers. If you feel that the values do not meet your expectations after viewing them, you can refer to the tips we have provided. We will use an AI tool as an example in that section. If you still have any questions, please feel free to contact us. Now, let's get started.
First, let's start with a Windows computer. In this section, we will present you with three possible methods.
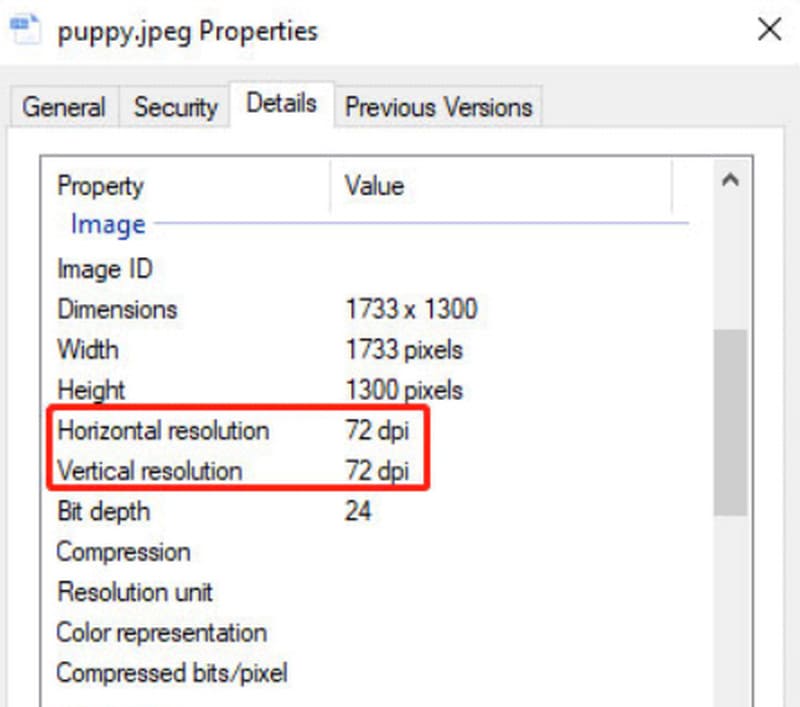
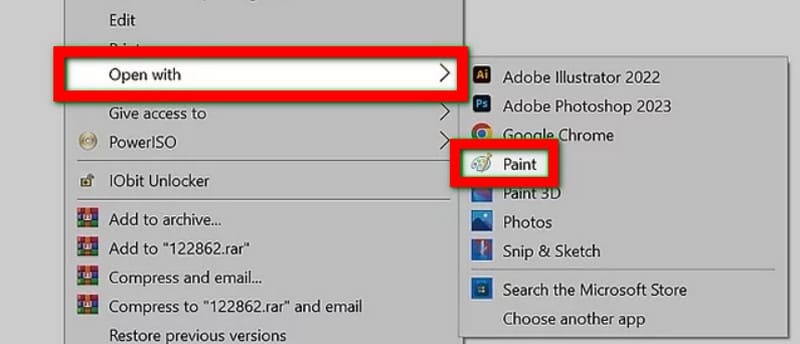
If you want to check the DPI of an image on a Windows computer, the most direct way is to check its properties. On that window, you can learn almost everything about the parameters of that image. The way to do it is very simple, just select the target image and right-click on it.
Here, we will show you how to do it step by step.
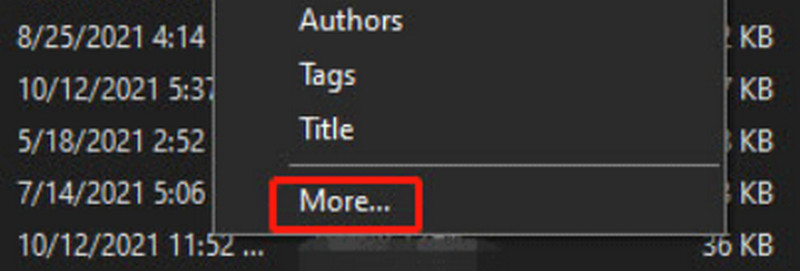
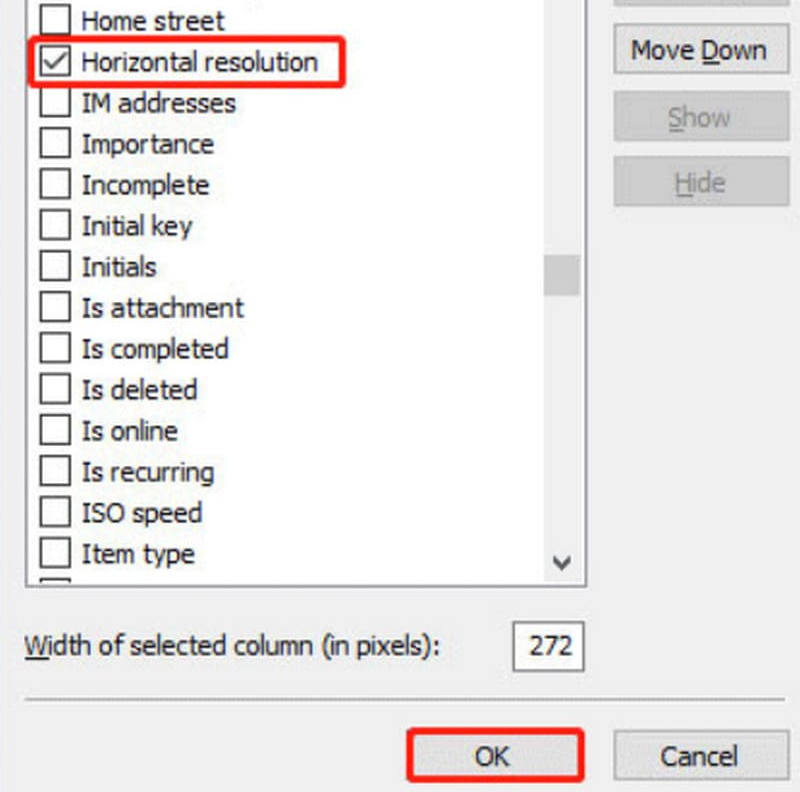
There is a very simple way to find the DPI of an image other than being able to view it in the Properties window. You don't even need to go into the window for a particular file; you can view it in File Explorer. If you want to wake up the File Explorer window, you can find it directly in the desktop bar. Or use the shortcut keys. How you do it depends on your personal preference.
Here is what you should do to check DPI through File Explorer.

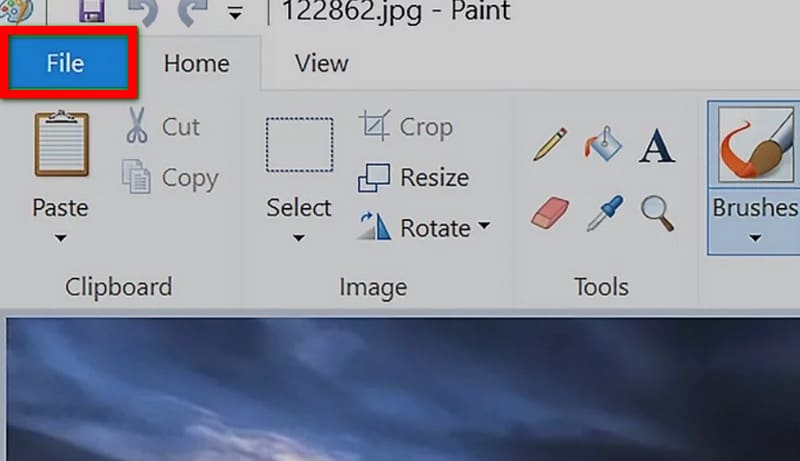
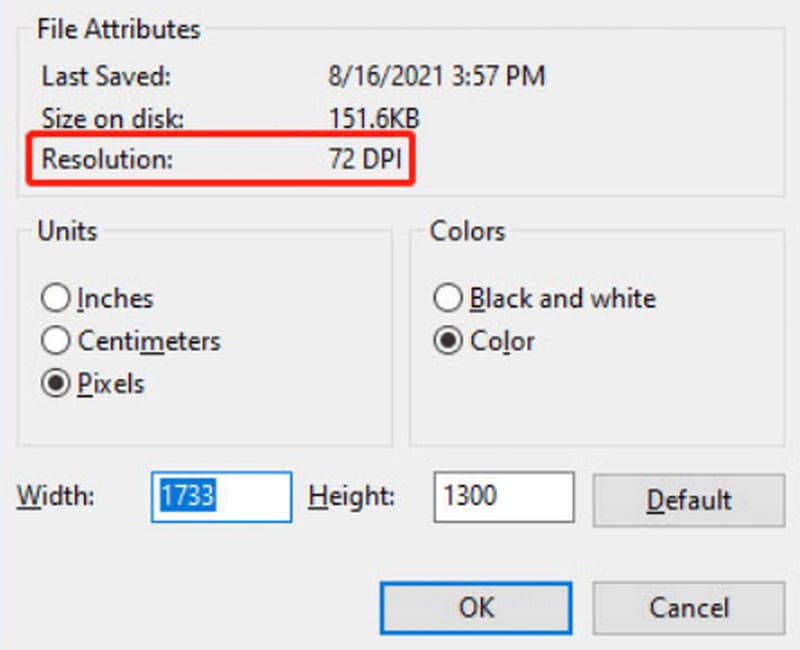
In addition to these two methods, you also have the option of using the Paint program that comes with your Windows computer to open your images. In the interface of this program, you can also see the DPI volume of your files. The procedure for this method is also very simple; let's learn it together.
Follow the steps below to check DPI with Windows Paint.
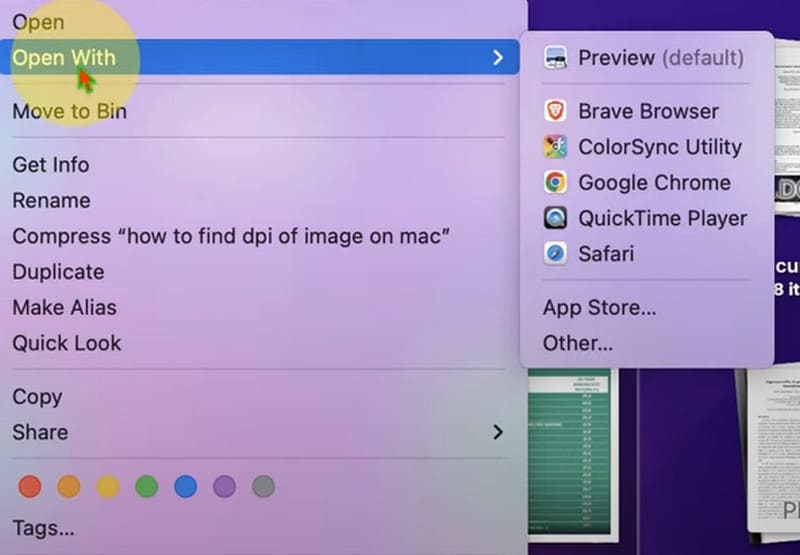
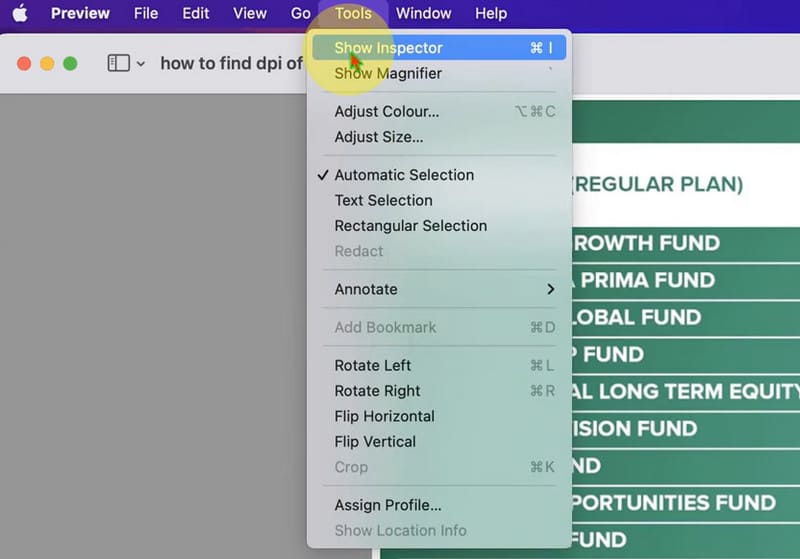
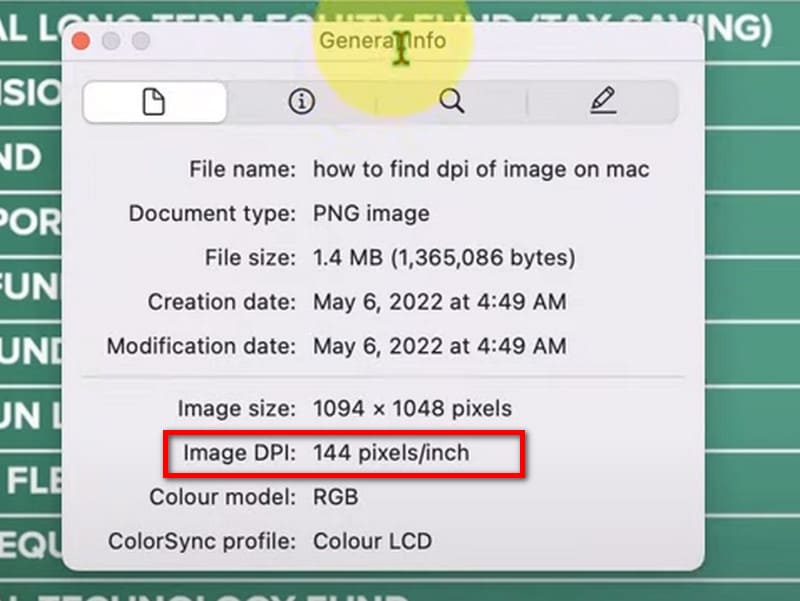
Now, we have fully understood how to view DPI values on Windows computers. So what do you do if you are a Mac computer user? How do you tell the DPI of an image? In fact, the operation principle of a Mac computer is similar to that of a Windows computer; both of them are viewed in the interface of file browsing through the tools that come with the computer. Next, let's learn how to perform on a Mac computer.
Here are the steps you can follow.
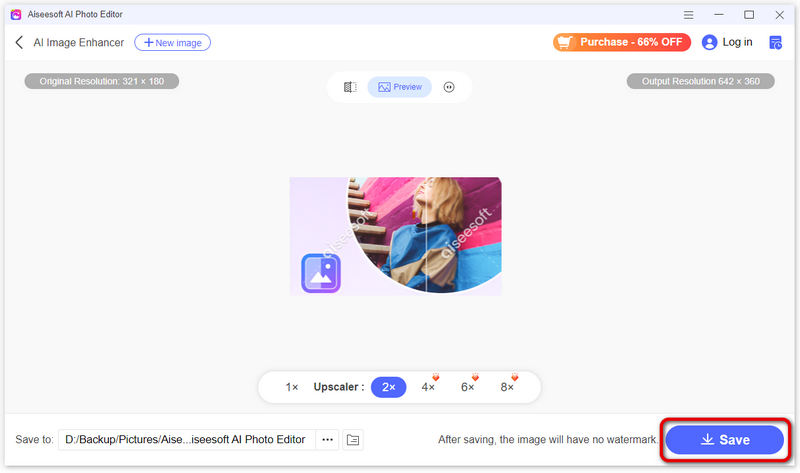
After reading the step-by-step guide in the above content, we believe you have now successfully checked the DPI value of your image. We already know that this value will have a direct impact on the sharpness of the photo. This means that if we want to make our photos sharper, we have to find a way to increase the DPI. Nowadays, many image enhancers can achieve this effect, especially some AI tools. With the aid of AI technology, we will no longer need to perform any complicated steps. Just upload the image to the platform, and you will get the enhanced image. Aiseesoft AI Photo Editor is an excellent member of these tools. It applies state-of-the-art learning algorithms to analyze your images, and then it enhances the image without losing the information in the original picture. It can automatically increase the DPI value of the file. Even novice users will be able to use it in no time.
![]() 100% Secure. No Ads.
100% Secure. No Ads.
![]() 100% Secure. No Ads.
100% Secure. No Ads.
Here, we will teach you how to use Aiseesoft AI Photo Editor.

How do you find the dpi of the image in Illustrator?
To open the Image in Illustrator, go to File > Open and select the image you want to check. Select the Image, and you will see a bounding box around the image once it is selected. Go to the top menu and click Window > Document Info. This will open a panel displaying various details about the document and selected objects.
How to calculate a DPI image?
Find out the width of the image in pixels. Decide on the desired print width of the image in inches. Substitute the image width in pixels and the chosen print width in inches into the formula: DPI = Image Width in Pixels / Print Width in Inches.
What size is 300 DPI in pixels?
The size of an image in pixels for 300 DPI resolution can be calculated using the following formula: Pixels = (Print Size in Inches) x (DPI). For example, if you want to find out the pixel dimensions for an image to be printed at a standard letter size of 8.5 x 11 inches with 300 DPI resolution, the width will be 2550 pixels, and the height will be 3300 pixels.
Can you calculate DPI from pixels?
Yes, you can calculate the DPI of an image from its pixel dimensions and print size. The formula to calculate DPI from pixels is DPI = Image Width in Pixels / Print Width in Inches.
Conclusion
This article shows you how to check the DPI of an image on your computer. This is not a complicated operation. So, whether you are using a Windows or Mac device, you can view it using the built-in tools on your computer. If you feel that your image's DPI is not high enough and the picture is a bit blurry, you can try our recommended AI image enhancement tool to increase the image’s DPI.
 Most Detailed Instructions for Changing DPI in Photoshop
How can we change the DPI of an image in Photoshop? What do we need to be aware of in this process? In this article, we will tell you everything you need.
 A Complete Guide on Choosing the Right DPI for Printing
Concerned about photos that come out on your printer? Our DPI for printing analysis assists you in selecting the ideal option for perfect prints.
 An Analysis of DPI vs PPI: Print & Screen Resolution Explained
Discover the difference between DPI and PPI, as they influence the quality of images for printing and digital screens and achieve the correct resolution!

Enlarge and upscale images up to 4K in batches and remove image watermarks quickly for JPG, JPEG, BMP, PNG, etc.
![]() 100% Secure. No Ads.
100% Secure. No Ads.
![]() 100% Secure. No Ads.
100% Secure. No Ads.