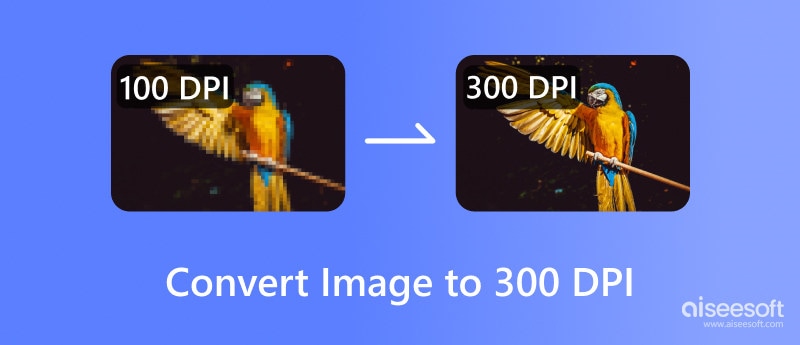
This article will reveal three simple techniques. They turn digital photos into stunning, high-res prints. We'll explore how to convert images to 300 DPI using Photoshop, Aiseesoft Image Upscaler Online, and Canva. We'll also discuss why 300 dots per inch (DPI) is the best for printing. It guarantees clear and detailed visuals. We'll also give detailed directions for each approach. We'll include a chart showing their pros and cons. By the end of this article, you'll have the skills to pick the best approach for your needs. You'll also be able to quickly turn any picture into a print-ready work of art in minutes! It will help you make an informed decision and capture cherished images!
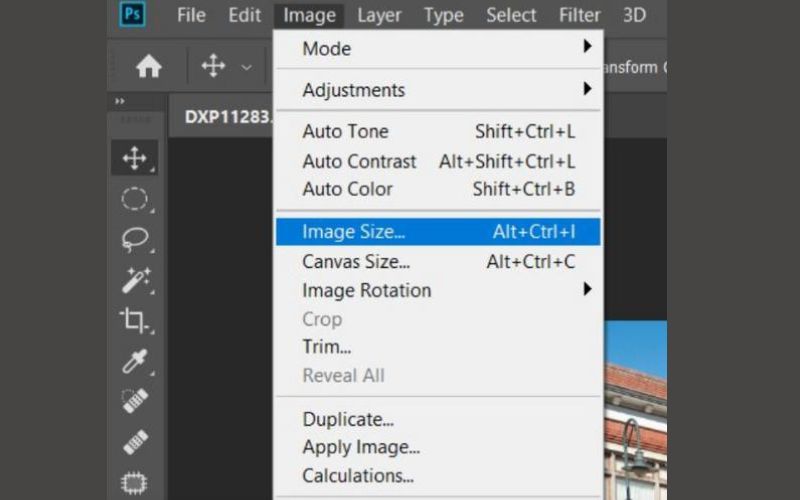
Adobe Photoshop is the premier tool among photographers and users who pay close attention to details when editing photos. Photoshop offers unmatched precision and adaptability. It excels at adjusting images for 300 DPI print quality. We will explain the process of transforming images to 300 DPI in Photoshop. It involves grasping the Image Size function. You will examine resampling techniques and find the right DPI for your printing needs. Here is how to make an image with 300 DPI in Photoshop.
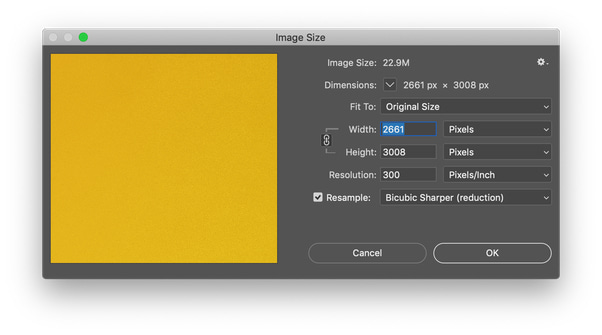
You can also sharpen your image in Photoshop when converting it to 300 DPI. In this case, you will get a much clearer output.
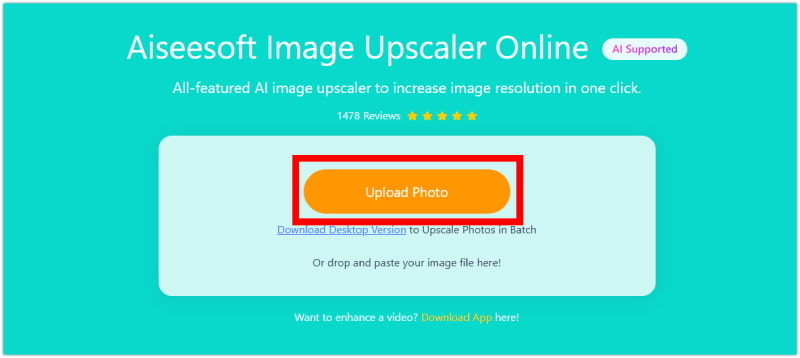
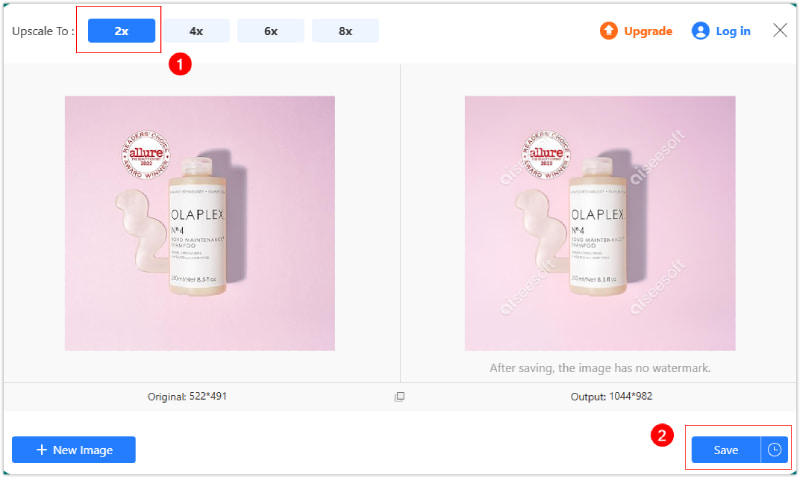
Only some people can afford professional editing tools such as Photoshop. Aiseesoft Image Upscaler Online is the savior for those searching for an easy-to-use and readily available option. We'll look at how Aiseesoft uses AI to enlarge your images. They aim to maintain the quality of the photos. You'll be eager to dive into the simple steps by finishing this introduction. They are needed to use Aiseesoft Image Upscaler Online. They will turn your low-quality images into great ones. They will be ready for printing at 300 DPI! Here is how to convert an image to 300 dpi without Photoshop using a simpler AI Image Upscaler.
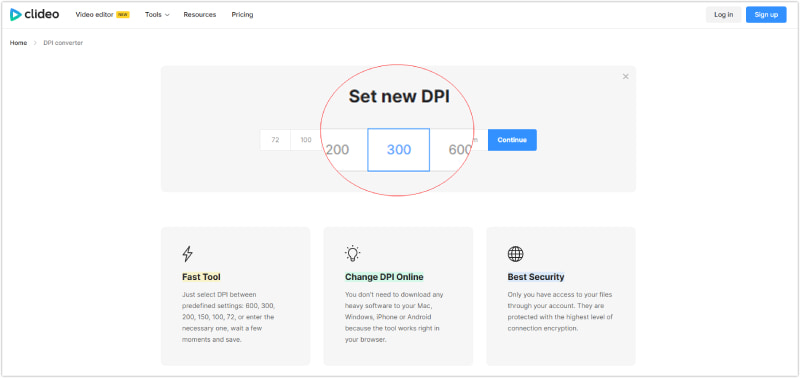
To set a particular dots per inch (DPI) for printing, you must utilize an image editing program like Clideo.com after increasing the image size. This program will enable you to modify the DPI independently, regardless of the pixel count.
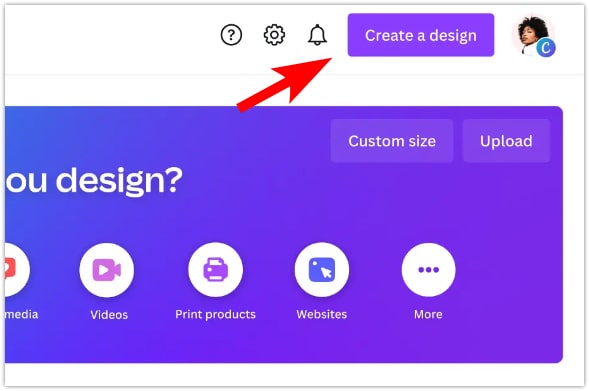
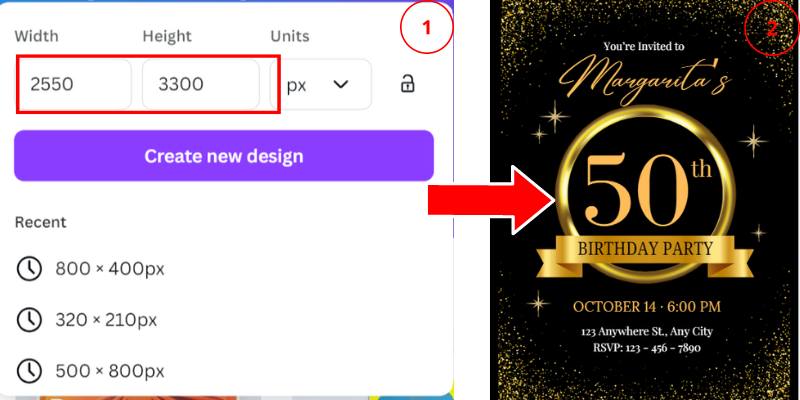
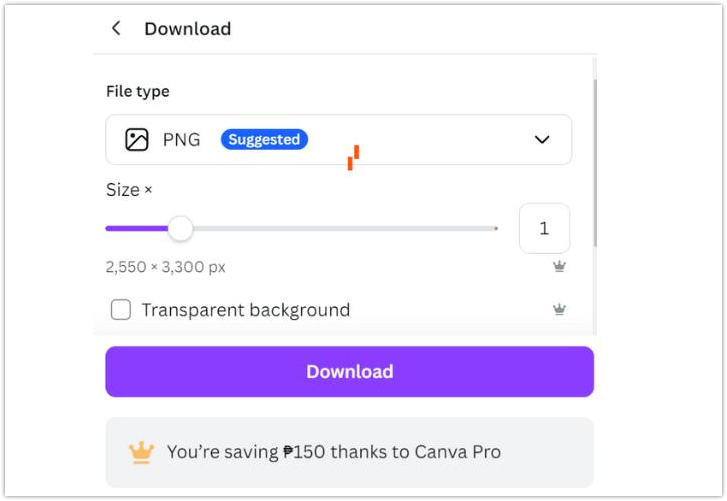
Canva is a leading digital design tool. It simplifies visual creation, making it accessible to novices. It has become popular because of its user-friendly design and many features. With Canva, you can make many graphic designs. For example, posts, stories, and covers for sites like Facebook, Instagram, and Pinterest. Moving forward, we'll delve into how to create a 300 dpi image in Canva to produce designs suitable for high-resolution printing at 300 DPI.
Selecting the correct image editing software can be a challenge. There are many options. Each has its pros and cons. Making a choice can be hard. To help you decide, we'll compare three well-known selections. They are Photoshop, Aiseesoft Image Upscaler Online, and Canva. We'll use a simple table for your easy glance. This table will list the good and bad parts of each software. It will help you pick the best one for your needs.
| Software | Pros | Cons |
| Photoshop | •Industry norm •Effective editing instruments •Great level of authority •Skilfully manages intricate modifications |
•Expensive •Steep learning curve •Not ideal for simple tasks |
| Aiseesoft Image Upscaler Online | •Easy to use •No software installation required |
•Limited editing capabilities •There are watermarks when images’ dimensions are over a certain size |
| Canva | •Free (with limitations) •User-friendly interface •Wide variety of templates and tools •Great for quick edits and social media graphics |
•Limited editing capabilities compared to Photoshop •Not ideal for complex edits •The free plan has a Canva watermark on your image |
What is the best pixel size for 300 DPI?
The optimal pixel size for a 300 DPI (dots per inch) resolution varies based on the actual size of the image you intend to print. DPI is a standard for determining the clarity of a printed image. It indicates the number of ink or toner dots required to depict every inch of the image.
Why should I convert the image to 300 DPI?
Convert images to 300 DPI for sharp, high-quality printed results. 300 DPI ensures pixels are dense enough to avoid being visible, creating a clean image. It's a common standard for professional printing.
How do I change an image to 300 DPI in paint?
To change an image to 300 DPI using Microsoft Paint and Paint 3D, Open the image in Microsoft Paint, resize it as needed, and save it. Then, open the saved image in Paint 3D, adjust the DPI in Paint 3D by going to Canvas, setting the resolution to 300 DPI, and saving the image with the new DPI.
Conclusion
Transforming an image to a 300 DPI resolution is crucial for producing top-notch printed materials. You can do this with this detailed guide. Learning how to make an image with 300 DPI in Photoshop, Aiseesoft Image Upscaler Online, and Canva becomes easier. Decide on the best way to convert your image to 300 DPI. Consider your needs and the software options. Then, make the best choice.
 A Complete Guide on Choosing the Right DPI for Printing
Concerned about photos that come out on your printer? Our DPI for printing analysis assists you in selecting the ideal option for perfect prints.
 How to Enlarge a Picture for Printing without Losing Quality
When you need to print photos, magazines, and other files, what is the optimal photo resolution and how to enlarge a picture for printing? Here are the answers you should know.
 How to Enlarge an Image in Photoshop Without Losing Quality
How do you make an image bigger using Photoshop? Can I enlarge an image in Photoshop without losing resolution? Learn to resize and enlarge images in Photoshop.
Enlarge and upscale images up to 4K in batches quickly with wide support for various image formats.
![]() 100% Secure. No Ads.
100% Secure. No Ads.
![]() 100% Secure. No Ads.
100% Secure. No Ads.