In the age of smartphone and music apps, it seems that not many people have the need to burn music to a CD, but sometimes when a spinning audio disc can do, especially for CD lovers, teachers or others who want to send their recordings to the record companies.
How to burn music to a CD? There are multiple ways to burn music to a CD. In this article, we would like to show you how to burn music to a CD with iTunes, Windows Media Player as well as RealPlayer.

How to Burn Music to a CD
You are able to burn music to a CD with the help of iTunes. Before that, you decide what kind of CD that you want to use - CD-R or CD-RW. The CD-R only allows you to burn stuff once, and you can never delete the CD content. While CD-RW enables you to delete CD files and start over again. This in the advantage better than CD-R, but CD-RW is much expensive than CD-R.
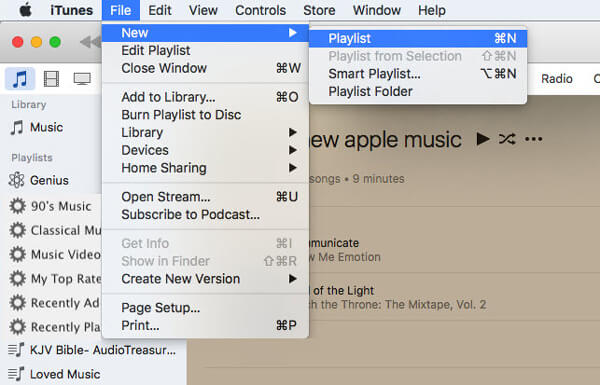
Step 1Create a new playlist
Launch iTunes on Mac or Windows computer. Click "File", and then "New Playlist". Rename the new playlist. You can click "File" > "Edit" Playlist" to add items or just drag and drop the songs into it.
Step 2Insert a CD
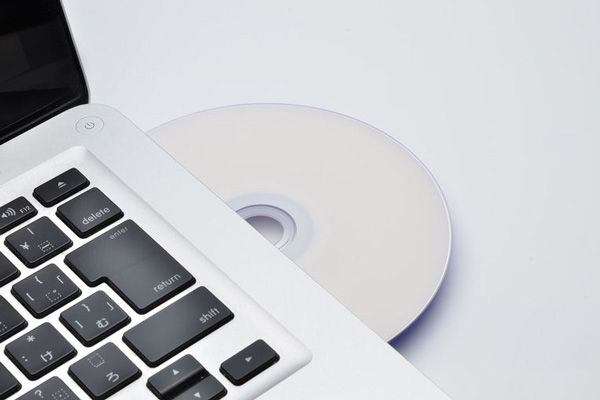
Insert a blank CD-R or CD-RW, your computer will soon detect the disc.
Step 3Ready to burn playlist to CD
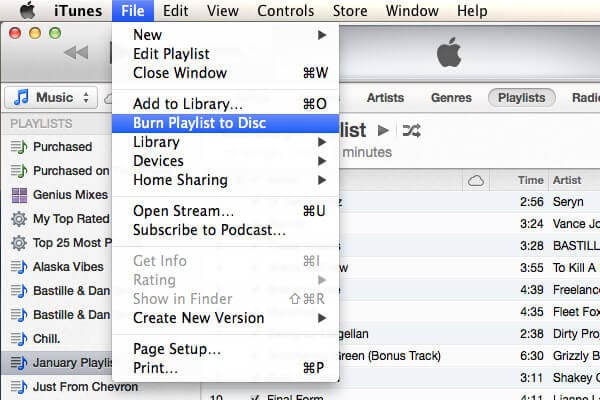
Go to iTunes, highlight the songs in the new playlist, and click "File" > "Burn Playlist to Disc". Click it, and iTunes will start burning the music you choose to the disc.
Step 4Burn iTunes playlist to CD
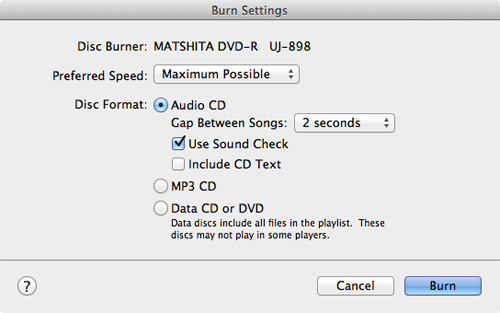
In the pop-up CD burning settings, you can set the preferred burning speed, gap between songs and the disc format. After the settings, click "Burn" button to burn iTunes music to CD immediately. The music to CD burning process will cost two to five minutes, depending on the number of songs on your iTunes playlist.
You can create a music CD that stores up to 80 minutes on Windows Media Player. And the following is how to burn music to a CD with Windows Media Player.
Step 1Choose CD type to burn
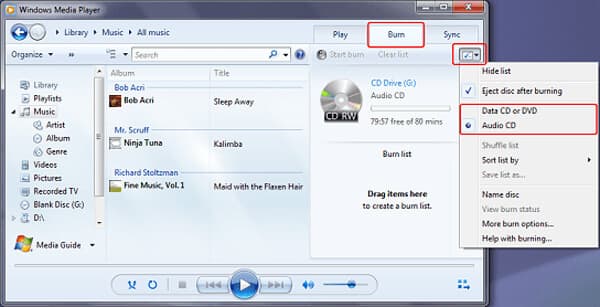
Open Windows Media Player on your Windows computer, in the Player Library, select the Burn tab, select the Burn options button, and then choose Audio CD or Data CD or DVD. Here we choose Audio CD.
Step 2Insert a black CD
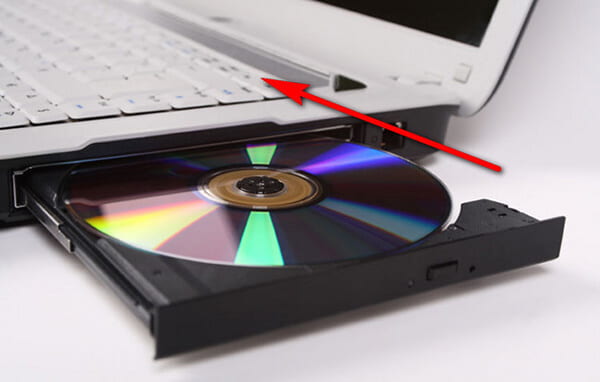
Insert a black disc into your CD burner. If your computer has more than one CD drive, select the drive that you will burn.
Step 3Burn music to a CD
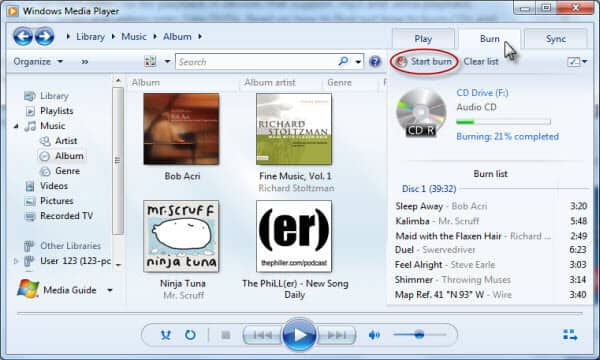
Find the music items in the Player Library to create a burn list. After that, click "Start burn" to burn music to a CD with Windows Media Player.
Here is how to burn music to a CD with RealPlayer:
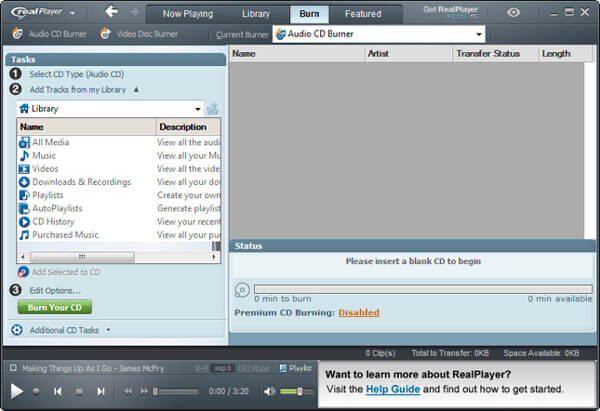
Step 1Burn View in RealPlayer
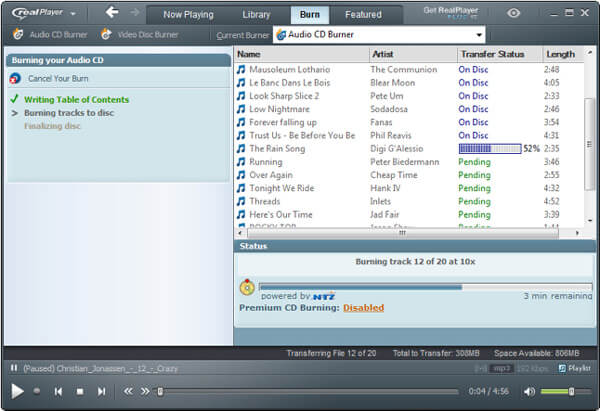
Click "Burn" from the top bar and choose "CD Type" under "Tasks".
Step 2Choose a CD type
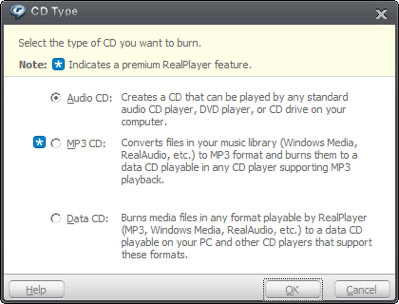
A dialog window will pop up to let you decide what type of CD you want to make. The default is "Audio CD". Click "OK" button.
Step 3Add music
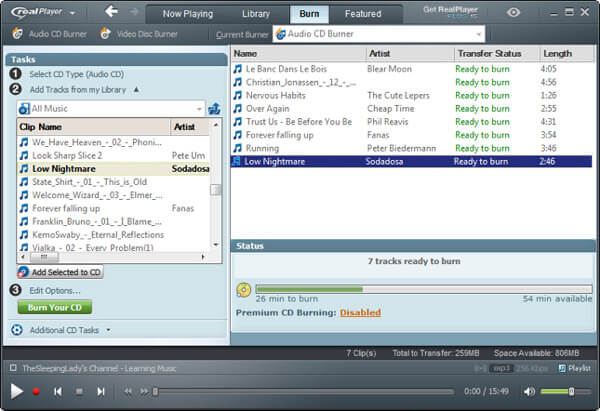
Use the Library browser in the Tasks bar to find the music. You are able to drag individual songs, playlists, or albums over. Click and drag the songs in the "Burn" window to set the track order for the final CD.
Step 4Set the Burn CD Speed
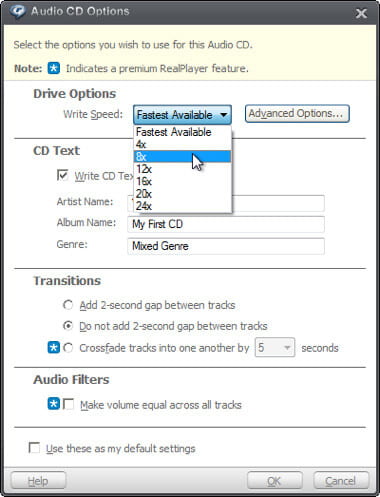
Click the "Edit options" link at the bottom of the Tasks bar. This will open the "Audio CD Options" window. You can set the write speed, CD text, gap between tracks, and volume leveling. Once you are happy with the settings, press "OK".
Step 5Burn music to a CD
Now click the "Burn Your CD" button of the Task bar. The CD will begin burning, and the progress bar will show how much time is remaining. Depending on the speed of your burner, the process may take several minutes.
In this article, we mainly show you how to burn music to a CD with iTunes, Windows Media Player as well as RealPlayer. If you have any better idea on music to CD burning, welcome to tell us.
