PNG image is a lossless compressed bitmapped image. Different from JPG and other files, PNG image does not quite fit photographic image data storage.
However, when it is compressed, you can still get an optimized PNG image, which supports higher quality and suits large areas of solid colors and defined boundaries better.
Now, the question is how to compress a PNG file?
There is no denying that Photoshop is the best choice, and this passage gives you detailed steps to help you compress a PNG file with Photoshop. In addition, this tutorial also lists 4 alternative PNG compression tools for you to take into consideration, and you will find very little difference between Photoshop and these 4 alternatives.

Compress PNG
Compression is a technique that reduces the file size of bitmap images. The compressed PNG images can be used on web pages to improve viewing speed and performance. Photoshop makes it much easier to compress a PNG file than it used to be, and arguably more powerful than any other programs.
Follow the next steps to compress a PNG file via Photoshop:
Step 1 Launch Photoshop app
Open Photoshop app on your computer by double clicking on its icon, and then tap on "File" button in the top menu bar.
Step 2 Upload a PNG image
Select "Open" from the drop-down list to import a PNG image that you want to compress to Photoshop. If you copy a PNG from the clipboard, tap on "File" and choose "New from Clipboard".
Step 3 Save the original PNG
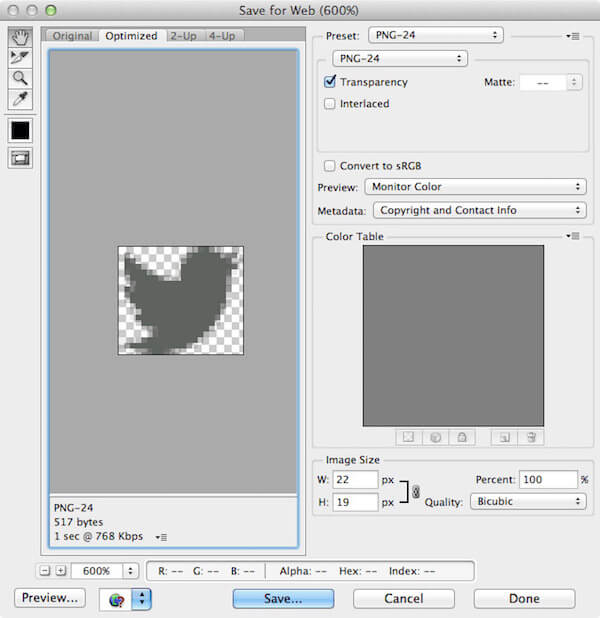
From the top bar, hit on "File" button and click on "Save for Web" button to save the original PNG image. Or you can choose to hold down "Alt+ Shift+ Ctrl+ S" on your keyboard.
Step 4 Check detailed settings
Now you can see a "Save for Web" dialog box show up. You will be able to check detail settings, download speed information and so on about the PNG image. You can also preview the PNG quality settings.
Step 5 Compress the PNG file
In default, it is set to Maximum 100%. Just input a suitable proportion in "Percent" option, such as 80%, until the file size is small enough, tap on "Save..." button to save the compressed PNG image.
Moreover, Photoshop also works well in creating a GIF file. Learn more details here to make a GIF in Photoshop.
TinyPNG is an online compression tool, using smart lossy compression to help you compress and optimize your PNG files. By selectively decreasing the number of colors in the PNG image, fewer bytes are required to store the data, and the effect that it reduces the file size of PNG is clear.
Step 1 Open TinyPNG website
First of all, enter "tinypng.com" in Google or other browsers to load TinyPNG website on your computer.
Step 2 Add a PNG file
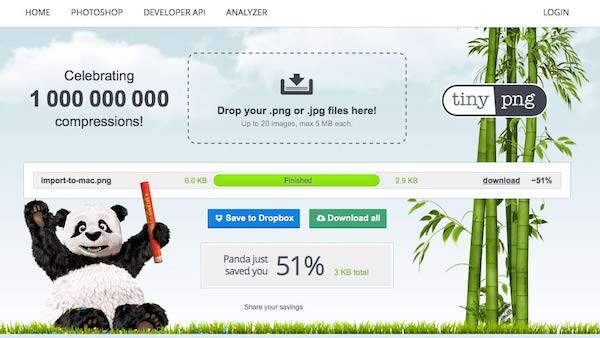
From the main screen of TinyPNG, drop a PNG file into the added box. You are able to upload no more than 20 PNG images, and up to 5 MB each.
Step 3 Compress the PNG image
Once added, TinyPNG will compress the selected PNG image automatically. And you can see its file size after compression.
Step 4 Download the PNG image
Finally, tap on "download" button to save the new created PNG file to your computer. You are allowed to save t to your Dropbox if needed.
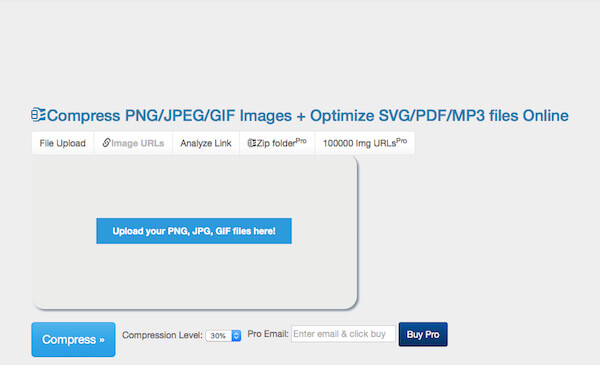
Way2enjoy is another online alternative that uses the same lossy compression techniques to compress PNG, JPG, and GIF files as well as optimize SVG, MP3, and PDF files. With easy steps and clean interface, it enables you to reduce the file sizes of your PNG images on the fly without downloading.
Step 1 Upload a PNG file
Search and find Way2enjoy on Goggle, and open its official website. Then import a PNG image into the "File Upload" box, or type in the URL of an online PNG file.
You can add a PDF file to compress PDF file with this online tool.
Step 2 Adjust compression settings
Below the "File Upload" box, choose the compression level. If you are a paid customer, give your email ID in the "Pro Email" box.
Step 3 Start the PNG compression
Next tap on the "Compress" button to start compressing the added PNG file. Wait for a few seconds, and you will get the new PNG image with smaller file size.
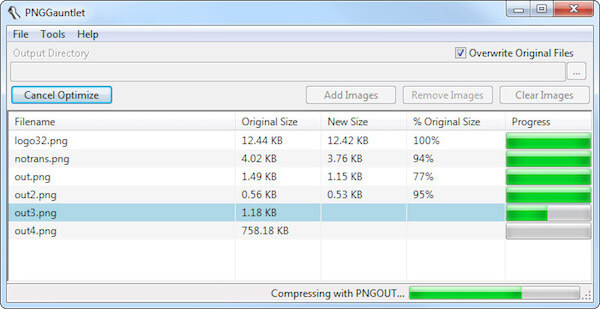
Combining PNGOUT, OptiPNG, and DeflOpt, PNGGauntlet is a powerful compression program to help you create the smallest PNG images. It guarantees that there is no loss of image quality during compression. In addition to compressing PNG images, PNGGauntlet is also good at converting IPG, GIF, TIFF and BMP files to PNG format.
Step 1 Start this PNG compression tool
After downloading and installing PNGGauntlet app in your PC, hit on the "File" button in the upper left corner to add a PNG image.
Step 2 Compress a PNG image
Next tap on the "Optimize!" button to start compressing the PNG file. You are also supported to add multiple PNG images and optimize them at the same time.
Step 3 Check the process bar
When the process bar is 100% green, you have managed to compress the selected PNG image!
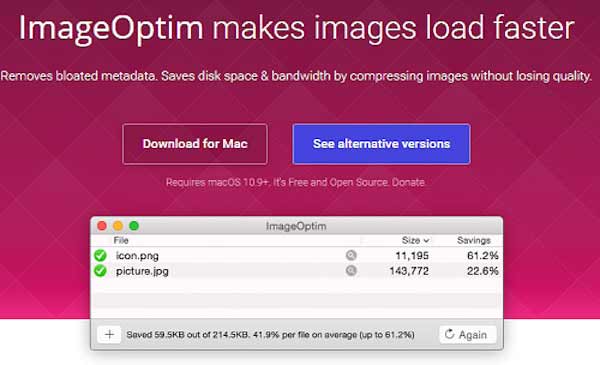
ImageOptim is an amazing PNG compression alternative on the web for Mac, iPhone, iPad. It works quite cautiously and preserves PNG file quality during the compression. Besides, ImageOptim removes EXIF metadata, including GPS position, camera's serial number, etc. That is to say, you can use this PNG compression tool without any privacy leak.
Step 1 Download ImageOptim app
Download and open ImageOptim archive on your Mac, then drag the ImageOptim icon into App Folder. Find this compression tool in Finder, and double click on its icon to launch it.
Step 2 Add the PNG image
Locate a PNG image that you wish to compress, drag and drop it into ImageOptim window. You can also tap on the "Add" button in the bottom left corner to import the selected PNG.
It also lets you upload other formats for compressing, like JPEG, JPG, TIFF, etc.
Step 3 Compress the PNG image
As soon as imported, the PNG image will be saved and optimized automatically. The whole process will takes a few seconds depending to the file size.
Once you can see a green checkmark next to the image, it means the PNG file has been compressed!
This tutorial is a comprehensive guidance about how to compress PNG files in 5 different methods. Photoshop should be the most powerful and professional compression tool, but it is a little complex to install; TinyPNG and Way2enjoy are simple to use and do not require downloading, but the compressed PNG files are lossy; while PNGGauntlet and ImageOptim enable you to reduce PNG images without quality loss, and you can choose one according to your computer system.
Have you ever managed to compress your PNG image? Please share your experience in the comment to help out your fellow readers.