Apple has introduced many useful features into iOS, such as iTunes and iCloud backup. For Mac, Time Machine is a utility for making backup and preventing from data loss. It is useful in many situations. For instance, when you delete an important file, Time Machine is able to bring your file back. Any time when a MacBook is crashed or frozen, it has the capacity to restore your Mac system. Moreover, if you decide to upgrade your old Mac to the latest model, Time Machine could transfer your Mac backup to the new machine quickly. Therefore, we are going to talk about how to restore from Time Machine.

Time Machine is a built-in backup and restore tool of macOS, Apple’s operating system for Mac computers. It was first introduced in Mac OS X 10.5 Leopard and has evolved through various iterations of macOS. The primary function of Time Machine is to create incremental backups of files, allowing users to restore their entire system or specific files at a later date. So, if your Mac data is lost, you can use Time Machine’s backup to retrieve it.
How Often Does Time Machine create new backups
Time Machine automatically creates new backups on a Mac every hour for the data of past 24 hours, daily for the past month, and weekly for all previous months. Therefore, you don't need to back up these data manully and daily to get a timely data restoration.
You can restore a file or an entire system from Time Machine, but the prerequisite is that you have turned on Time Machine backup on your computer. A part of users believed the backup would take up the limited storage. Is that means you cannot restore lost files without Time Machine? The answer is no. Aiseesoft Mac Data Recovery could meet your need.
All in all, Mac Data Recovery is the best way to restore Mac without Time Machine backups.
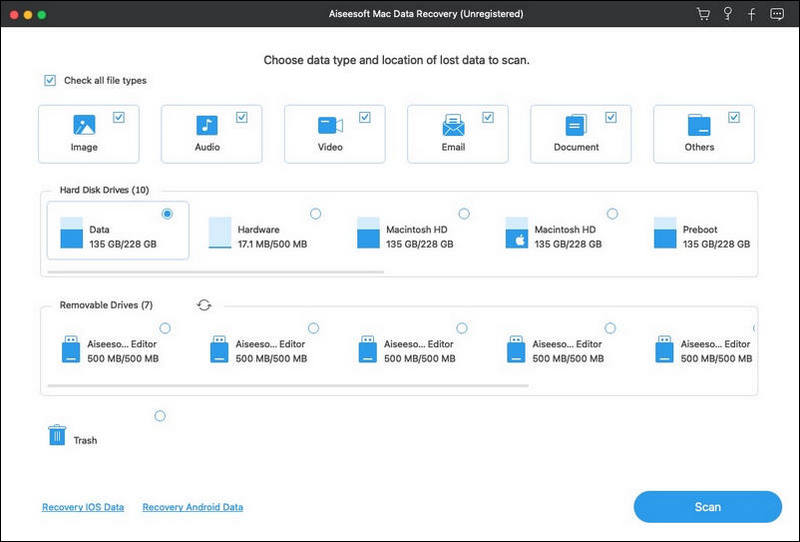
Download and install Aiseesoft Mac Data Recovery to your Mac. When you discover some important files disappeared, launch the data recovery software. Select the data types you want to restore in the first section and then choose where you save the lost files under the Hard Disk Drives area.
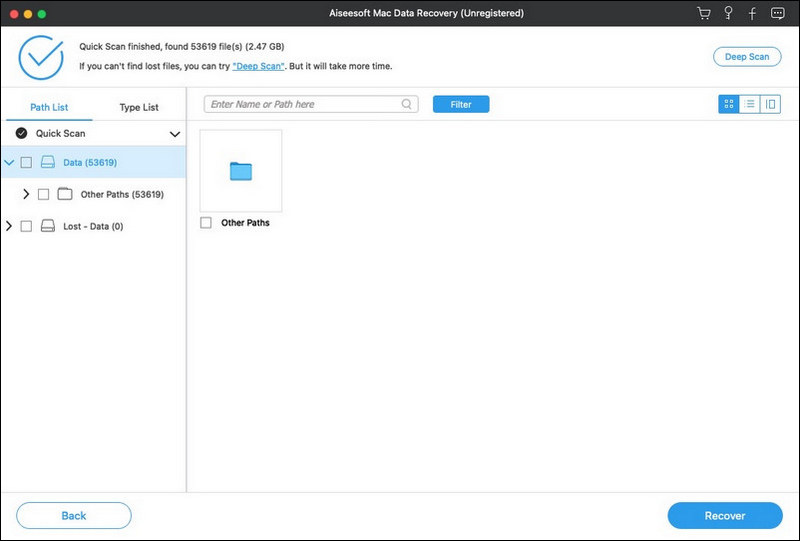
Click the Scan button to start looking for lost files on your hard drive. When it finishes, you will be taken to the preview window. You can search for the lost file with the Search Bar or find them from the Type List or Path List. For example, to restore a PNG photo, go to Image -> PNG from the Type List on the left side, and then you can look at the thumbnails of the images and find the desired file.
If you cannot find the lost file, click the Deep Scan button at upper right corner to perform a deep scan to your hard drive.
Make sure to select all lost files and click the Recover button to initiate the lost data on Mac without Time Machine backups. According to our testing, it only takes a few minutes to recover hundreds of documents from a computer, but it may depend on your hardware and amount of data recovery.
Note: Mac Data Recovery will restore the lost files to another drive, in order to prevent from data loss if your drive is broken or corrupted.
Time Machine is not only able to restore lost files from backup but also could restore the entire system. Read on to know more.


Time Machine is also a useful file transfer when you upgrade to a new Mac computer. It will migrate all your file, settings and preferences from an old Mac to a new one.
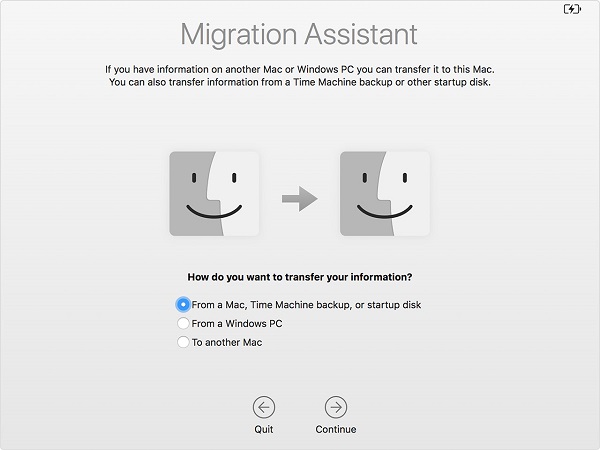
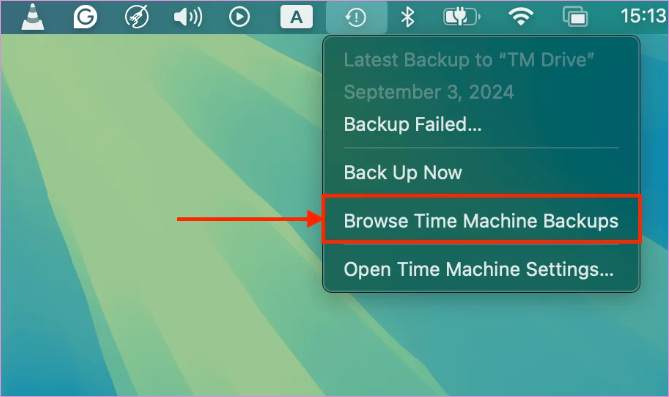
To perform a restoration of an SSD from Time Machine backup, you can use Recovery Mode. Just follow the guide below:

How to configure Time Machine on Mac?
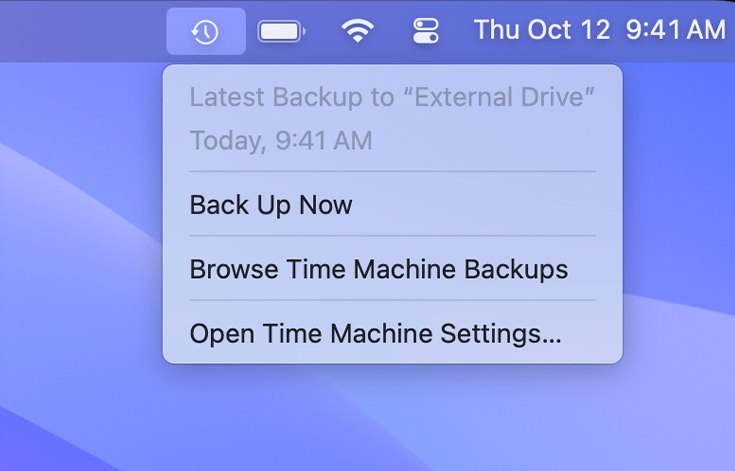
From the Apple Menu, go to “System Settings” > “General” > “Time Machine” > “Add Backup Disk”; you can now select your backup disk. Then, click “Set Up Disk” and end the configuration by clicking “Done.”
Does Time Machine restore applications?
Yes, it does, as long as there is a backup available and the applications are not installed during macOS installation. However, to avoid such data loss happening again, you’d better back up Mac data.
How to clean up unwanted Time Machine backups?
From the Apple Menu, go to “System Settings” > “General” > “Time Machine” > “Options.” Here, you can select the items you don’t want and click the “Remove” button to delete them.
Conclusion
This article shared several ways to restore from Time Machine. First of all, it is able to recover lost files and documents on your Mac computer. Moreover, you can use Time Machine to restore your Mac system, settings, and preferences whenever your computer crashes. If you decide to upgrade to a new Mac, Time Machine backup is also a convenient way to transfer data from the old device. Even if you did not set up Time Machine backup, Aiseesoft Mac Data Recovery could help you to get back lost files from your hard drive.
![]() 100% Secure. No Ads.
100% Secure. No Ads.
![]() 100% Secure. No Ads.
100% Secure. No Ads.
 Data Backup for Android and iPhone/iPad/iPod
How to make data backup for iPhone or Android to PC? This page will show you the easiest way to backup various data types from iPhone/Android to PC.
 How to Restore Mac from External Hard Drive with Time Machine or Not
This is the complete tutorial to restore Mac from external hard drive in different situations. You can get back the data you need from Time Machine backup or elsewhere successfully here.
 Proven Way to Recover Deleted Files from SD Card on Mac Safely
It does not matter if your SD card got corrupted, deleted or formatted. You can recover photos, videos and more with the SD card recovery for Mac software in minutes.

Aiseesoft Data Recovery is the best data recovery software to recover deleted/lost photos, documents, emails, audio, videos, etc. from your PC/Mac.
![]() 100% Secure. No Ads.
100% Secure. No Ads.
![]() 100% Secure. No Ads.
100% Secure. No Ads.