It is annoying for you that iPad cannot be connected to iTunes, especially when you want to transfer music and other data from iTunes to iPad or manage your iPad with iTunes. Actually, lots of people are suffering the same situation. There are three main cases as below:
So what can you do? How to fix disabled iPad?
Here we will introduce 3 easy solutions for fixing iPad disabled to connect to iTunes.

Disabled Connection from iPad to iTunes
If your iPad is not locked and it says "disabled connect to iTunes" when you plug your iPad into computer, then how to enable the disable iPad?
1Connect iPad with computer
You need to get a usable or Apple original USB cable to connect iPad with computer.
2Reboot iPad in recovery mode
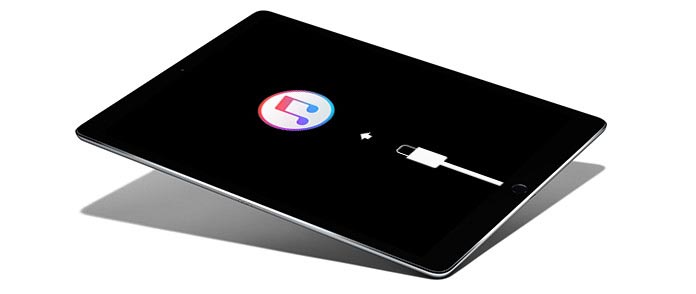
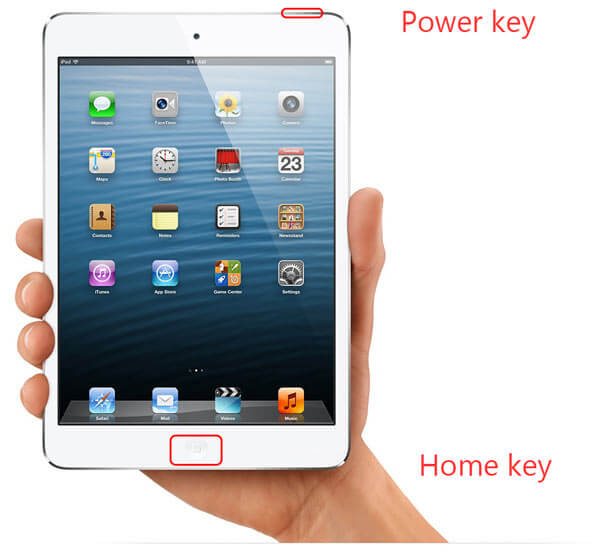
First, run the latest iTunes on your computer and plug your iPad into computer via USB cable. Second, press your iPad "Home" and "Power" buttons at the same time until iTunes icon shows up, which means your iPad in recovery mode and please choose "Restore".
3 Reconnect your iPad to iTunes
After iPad firmware is restored, please disconnect iTunes and iPad and reconnect them again.
iPad is locked and says "iPad is disabled, connect to iTunes". But when you connect the disabled iPad to iTunes, iTunes will remind you of "iTunes cannot connect to iPad because it is locked with a lockcode. And you must submit the lockcode on your iPad to make it compatible with iTunes". It is an endless loop, right? How terrible! So how to unlock disabled and disconnected iPad? Follow us to find the answer.
1Reboot iPad in recovery mode
According to the "Step 2 in Part 1" paragraph above, you can restart your iPad in recovery mode with "Home" and "Power" buttons.
2 Backup iPad to computer
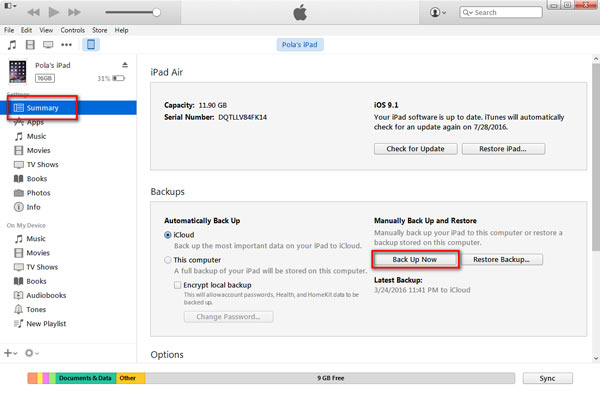
When you have rebooted iPad and your iPad icon shows on the top left menu of iTunes, click iPad icon to enter the "Summary" interface, and then tap "Back Up Now" to back up iPad data to computer.
3 Reset iPad
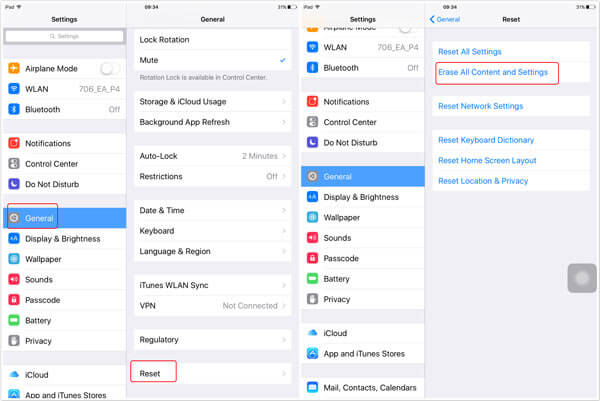
Go to your iPad, find "Settings", click "General" > "Reset" > "Erase All Content and Settings" to reset your iPad. This process will take some time and you just wait patiently.
4Restore iPad and reset iPad passcode
After erasing your iPad, you get a clear iPad. Please start your iPad and you can choose "Restore from iCloud Backup" or "Restore from iTunes Backup" to set up your iPad. After that, your iPad is not passcode protected, and absolutely it can connect with iTunes.
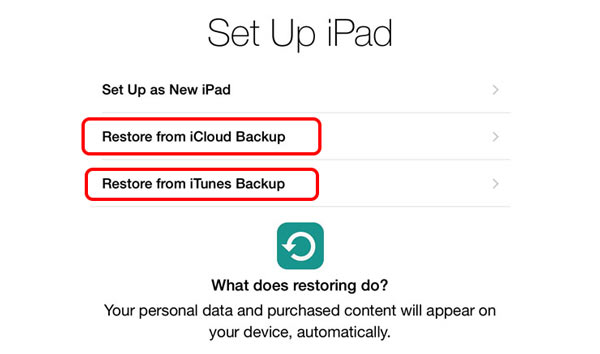
This method lets your data of iPad not lose, so maybe you really need this.
If your iPad says "iPad is disabled, connect to iTunes", just don't be upset, you can fix disabled iPad following steps below:
1Connect iPad to iTunes
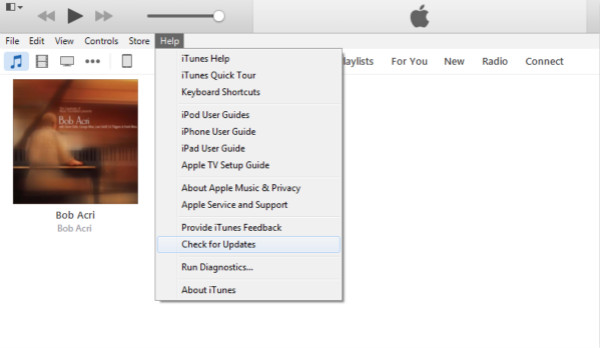
You need to connect to latest iTunes via USB cable according to the reminder. You can launch iTunes and click "Help" > "Check for Updates" to updating the latest iTunes.
2Backup iPad to computer and restore iPad
Click iPad icon on the top left menu of iTunes, and enter the "Summary" interface. Next, click "Back Up Now" under "Backups" to backup your iPad files. After that, click "Restore iPad" under your iPad information of "Summary" window.
3Set up your iPad
When your iPad shows "Set up your iPad", choose "Restore from iTunes Backup" to enable your iPad again.
By now, we have introduced all the solutions when iPad is disabled to be connected to iTunes, and you can choose one of them to fix your disabled iPad according to the practical situation. And just in case that you lose iPad data, we recommend you back up iPad to iTunes or iCloud in advance, or if you have no backups, don't worry, you can use iPhone Data Recovery to recover the lost data after iPad resetting. With it, you can:

Anyway, it will be better that you have no data loss when you fix the problem that iPad is disabled connect to iTunes. If iPad data lose, we hope you will be satisfied with this recovery software, and good luck to you.