"The photos and camera video shot takes up too much capability of my iPad Air 2. I want to move them to my MacBook Pro." – Richard
"The video I recorded by my iPad Pro is awesome, and I want to let it be transferred to my MacBook Air and burn it onto a DVD." - Linda
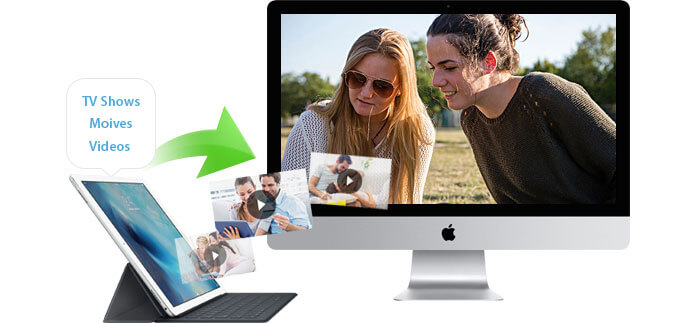
Have you ever been in this situation that you record a video using your iPad and you want to transfer it to your Mac to edit with professional editing tool, such as iMovie, Final Cut Pro, Sony Vegas, and so on. Or you have a desire to make a DVD of the iPad video and share the video with your friends or family. What's more, the TV shows or movies you download to Mac also take up much of your iPad capability. As you may find that the available space of your iPad is decreasing, you have to transfer your videos, including camera video shots and moives/TV shows from iPad to your Mac to make some room for the further use. However, you can only transfer the camera video shots to your Mac. If you want to transfer your movies and TV shows, you will find that iTunes does not help you at all, because it can only sync videos/movies to iPad, but never sync back, and then you head to Apple website to ask for help, no one can provide you a solution that works.
How to deal with it? This article will show you how to transfer/back up iPad videos to Mac, such as camera video shots, videos you downloaded from online ways or purchased from iTunes store step by step. After reading it, you could easily transfer your iPad videos to Mac.
When you have to move you camera videos that takes up too much space of your iPad, you can choose to do that via Email. And then you can sign in to your Email and download them to Mac hard drive.
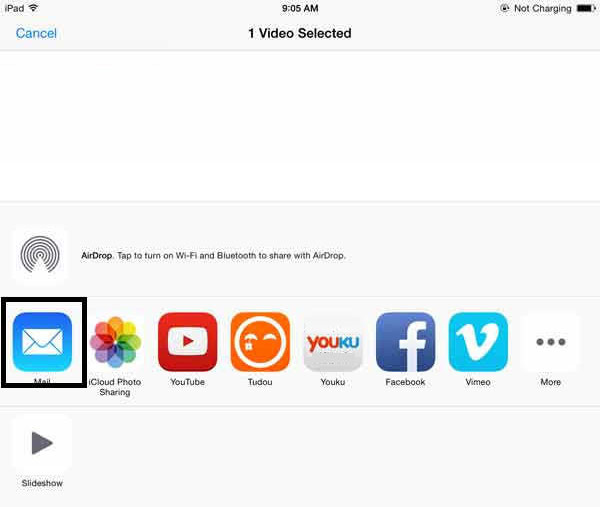
However, this method needs much time and good Internet connection when you move camera videos though it doesn't need any software or USB cable. If your video camera video are too long, that will be very troublesome in the process of transferring.
iPhoto is a digital photograph software developed by Apple. Macbook users may be familiar with iPhoto because it has been installed. Apart from transferring iPad photos to Mac, iPhoto can also move camera video shots from iPad camera roll to Mac. Sadly, you only transfer your Camera Shot to your Mac, you can never transfer/back up your movies and TV shows to your Mac.
Step 1 Connect your iPad to Mac via USB cable
Notes: As iPhoto has been installed already, it will be pop-up when you let your iPad be connected with Mac. If not, operate iPhoto and find your iPad in the left column of the main iPhoto interface.
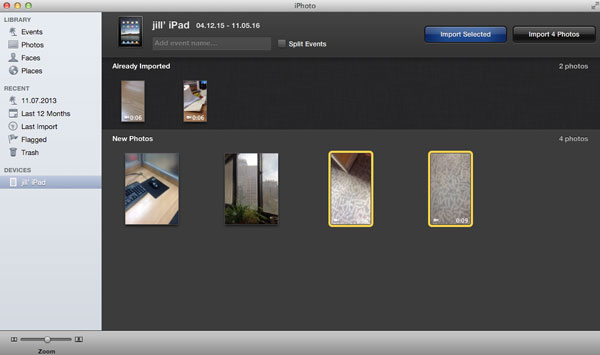
Step 2 Select camera video shots into iPhoto library
Detailed information of photos and camera videos will be shown in the main window. Select the camera videos you want, click "import selected" to import videos from your iPad into iPhoto library.
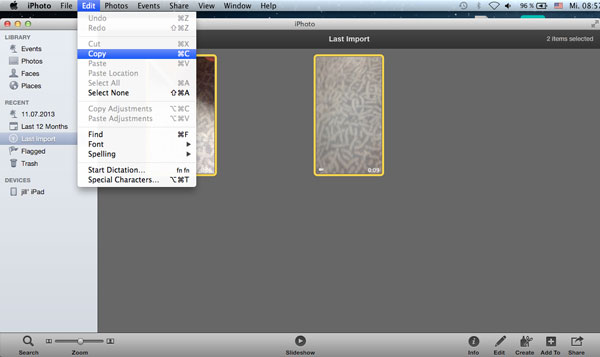
Step 3 Transfer camera videos to Mac hard drive
Click the tab of "Last Import", select all and click "Edit" on the toolbar of iPhoto, and then choose "Copy".
Step 4 Go to "Finder" of your Mac, click "Edit". Find "Paste xx items", then your iPad camera videos will be transferred to Mac.
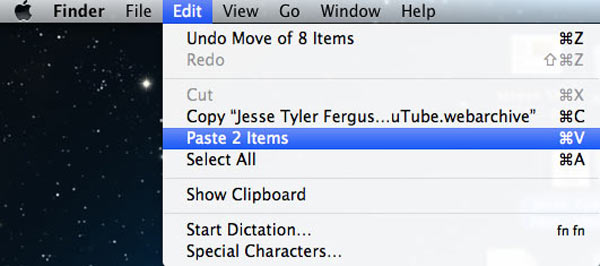
In this method, you can easily transfer iPad photos and camera videos to your Mac, but you cannot move other videos to Mac using this way. Is there any solution to directly transfer both camera video and other videos or TV shows from iPad to Mac. In the next part, a reputable and flexible Mac iPad Video Transfer will be introduced to easily solve your transferring problem.
iPad Video to Mac Transfer is designed for Mac users to export their iPad videos, including movies, or videos from iTunes store as well as camera video shots recorded by build-in camera of iPad, to Mac easily. The following is a step-by-step article to show how to do that with few clicks.
Step 1 Download and run this software on your Mac computer
In order to transfer videos from iPad to your Mac, you need to download Mac iPad Video Transfer and run it on your Mac, it supports Mac OS X 10.5 and higher versions, including Mac OS X El Capitan.
Step 2 Connect your iPad with your Mac
After you start the software, you need to connect your iPad to your Mac. Then the software will automatically load your iPad's information and show you on the main interface.
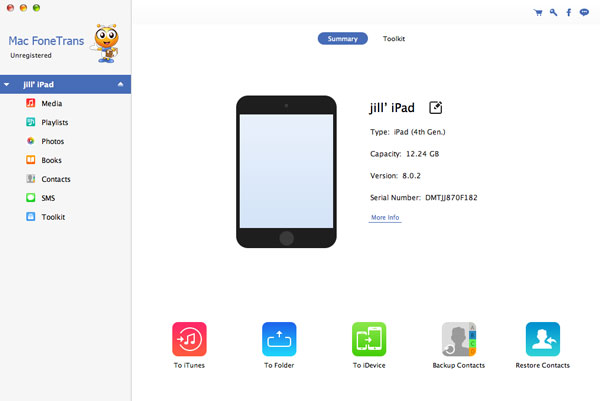
Step 3 Find the videos you want to transfer
You can find "Media" on the left side of the software and if you click it, you will find all your movies, TV shows and other media files in the interface of the software for you to choose. Click "Photos" > "Videos", and you will find the video recorded by iPad.
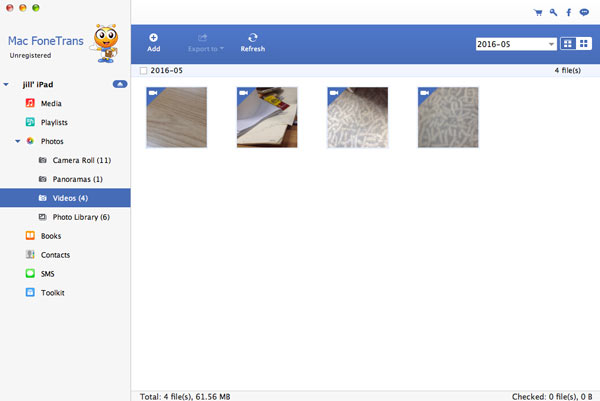
Here you can see all the video footages you recorded using your iPad and you can easily preview the videos and decide which you want to transfer from iPad to your Mac easily.
Step 4 Transfer videos from iPad to Mac

Check the video files you want to transfer and click "Export to" - "Export to Mac". Then choose the file folder where you want to save the video file on your Mac.
Then you can share them with your friends and family. This iPad to Mac Transfer supports the iPad Pro, iPad Air 2, iPad Air, iPad mini 4/3/2, iPad 4, iPad mini, iPad with Retina display, The new iPad, iPad 2 and the first generation of iPad. If you are an iPhone and iPod user, you can also use this software and the operation is the same. It also supports iPhone 16/15/14/13/12/11/XS/XR/X/8/7/SE/6/5/4/3GS, iPod touch/Shuffle/Nano/Classic. Besides copying videos from iPad to Mac, this software can also transfer contacts, messages, notes, music, voice memos, voicemail and more between different iOS devices. For instance, you can transfer songs between two iPads. What's more, it enables you to import songs, videos or other files from Mac to iPad, iPhone and iPod.