iMovie is the free built-in video editing software for Mac users. When you finish the editing on this program, you need to export the project. No matter which way you will choose to export the project as the video file for storing on your Mac, or just share the iMovie project directly to iTunes, Email, etc, you will also need this post to help you do that.

When you finish creating a project, you can finalize it. Finalizing a project will get your movie in all of the possible sizes and resolution (720p HD and 1080p HD). You cannot see the finalized project in iMovie, but iMovie can uses the file when you share a project to a social media website.
Step 1 Select one project from the "Project Library". Here you should find the project that you think complete because if you edit further a movie you have finalized, iMovie will discard the finalized versions.
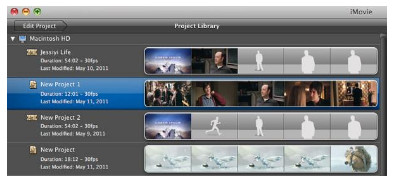
Step 2 Choose "File" > "Finalize Project" to start to finalize the project. The time of finalizing the project will depend on the size of the project. You just need to wait minutes till the finalzing dialog disappears.

Apart from saving iMovie as the project, you will be able to export iMovie project as the file in various formats.
Step 1 Select a movie, trailer or clip in the iMovie, click "Share" button in the toolbar > Click "File".
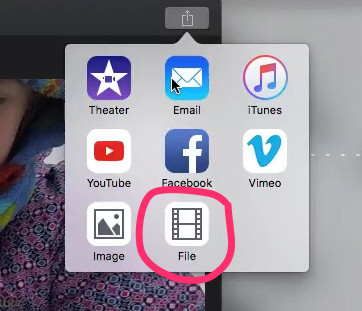
Step 2 Set the output format
In the export dialog, you can set the title, description, output format, tags, resolution, output quality, compressing setting, etc.
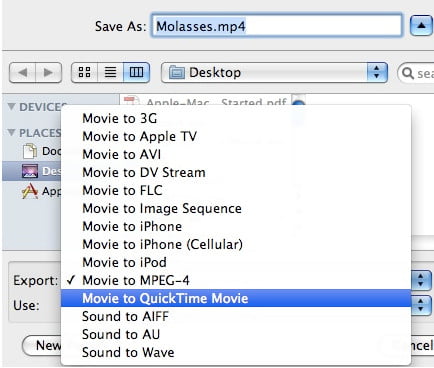
Step 3 Save iMovie to Mac
Click "Next" and one dialog will appear, type a name in the "Save As Field". Navigate the location where you want to save and click "Save" to start to export the iMovie video.
After the process is complete, QuickTime will open the movie automatically.

Note: The exported video formats can be MP4, MOV, AVI, DVD, Image Sequence, and resolution can be as 720p HD, 1080p HD and 4K.
If you want to use the exported iMovie video file on other devices like Windows Media Player, then you have to convert iMovie to other formats.
If you create the iMovie project for sharing online sites, like Facebook, iTunes, Email, etc. directly, then you're worth reading this part. Here we will take exporting iMovie as the example.
>Step 1 Select a movie or clip in the Theater, click "Share" button > "Video".
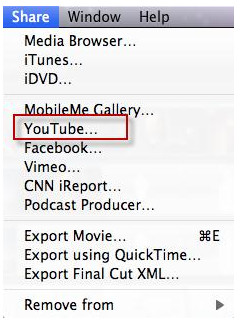
Step 2 Make iMovie share settings
Here you need to add your social media account, password, category, title, description, tags, select the size to publish and click "Next" after all information are done.
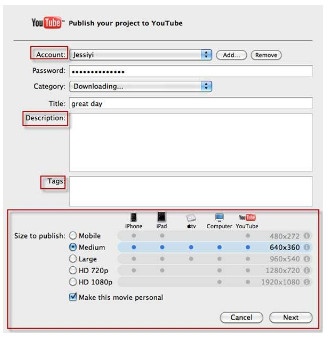
Step 3 Hit "Publish" to start to upload iMovie to share with others. After you export iMovie, a window will pop up to ask you if you are willing to "Tell a Friend" to send the link.

As mentioned before, iMovie can export iMovie as the video or audio file, but the exported formats are limited. If you want to use the iMovie file as SWF, ASF, WebM, or M4V, you have to convert the exported iMovie file to other video formats. Free Video Converter is the freeware that can help you exactly.
Free download this iMovie converter here.
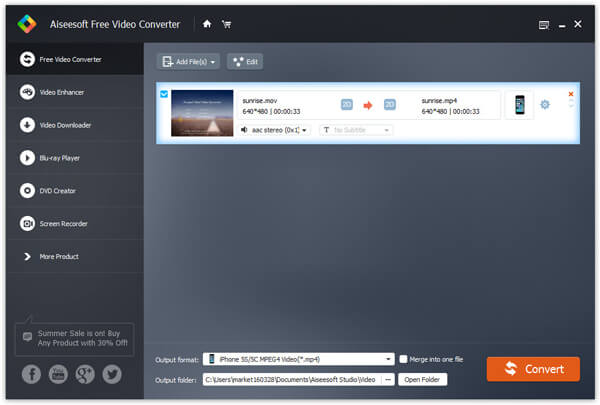
Step 1 Run this software on your computer.
Step 2 Click "Add File(s)" to import the exported iMovie file on Solution 2.
Step 3 Select the output file from "Output format", and click "Convert" to start to convert iMovie file to other video and audio file format.
This post shows you how to export iMovie to a file or project, even share online. If you want to make your iMovie file into a DVD for preservation, here you could jump to How to export iMovie to DVD.