iOS users often back up their iPhone/iPad/iPod to iCloud or computer through iTunes. You can easily find your data on iCloud. However, you may have no clear idea that where are iPhone backup stored by iTunes. iTunes always keeps the iOS backup on the main system drive. With the increasing backup files overrun the main system drive, you might want to change iPhone backup location. In this article, we'd like to show you where to find iTunes/iCloud backup location and how to manage and change iPhone backup to another folder on Windows 10/8/7/Vista/XP and Mac OS X/11.
iPhone Backup Location
iTunes backup files will kept locally on your Windows and Mac once you back up your iPhone/iPad/iPod via iTunes. iTunes will save all backups on a folder named "Backup". If you don't know how to find iTunes backup location, then the following table can help you.
| Operating System | iTunes Backup Location |
|---|---|
| Windows 10 | C:\Users\USER\AppData\Roaming\Apple Computer\MobileSync\Backup |
| Windows 8 | Users(username)/AppData/Roaming/Apple Computer/MobileSync/Backup |
| Windows 7 | Users(username)/AppData/Roaming/Apple Computer/MobileSyncBackup |
| Windows Vista | Users(username)AppData/Roaming/Apple Computer/MobileSync/Backup |
| Windows XP | Documents and Settings(username)/Application Data/Apple Computer/MobileSync/Backup |
| Mac OS | Home folder/Library/Application Support/MobileSync/Backup/ |
◆ You can directly manage iCloud backups on your iPhone. Unlock iPhone and choose "Settings" > "iCloud" > "Storage & Backup" or "Storage" > "Manage Storage".
◆ For Mac users, go to "Apple" menu > "System Preferences", click "iCloud", and then click "Manage".
◆ For Windows users:
• Windows 8.1: Go to "Start" and find the iCloud control panel, click "Storage" and manage iCloud backup.
• Windows 8: Go to the "Start" and find iCloud control panel, then click Manage.
• Windows 7: Choose iCloud control panel for Windows, then click "Storage" and manage iCloud backup files.
You can manage and change iPhone backup location stored by iTunes on Windows 10/8/7/Vista/XP and Mac OS.
Step 1 Shut down iTunes and head over to where iTunes currently stores your iPhone backup files. Copy all backup folders and then paste them to another folder that you create for storing iTunes backup. For example, you can create another "Backup" folder in D drive disk.
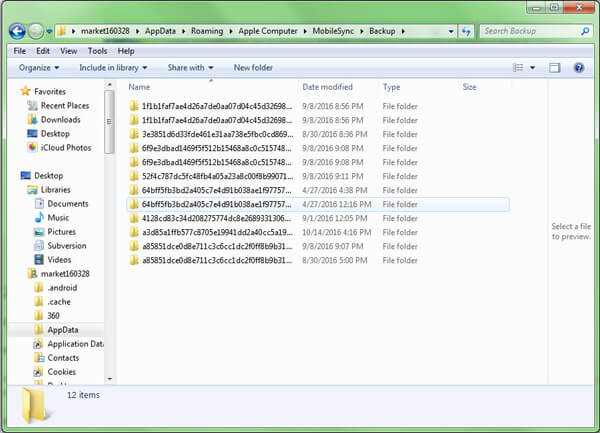
Step 2 Click "Start" and type cmd.exe and then enter the cmd.exe command window. In the pop-up command prompt, enter a commander: mklink /J "%APPDATA%\Apple Computer\MobileSync\Backup" "D:\Backup".

Step 3 You will now see the command prompt window return a success in creating a junction. And a new folder shortcut called "Backup" will appear in the original location.
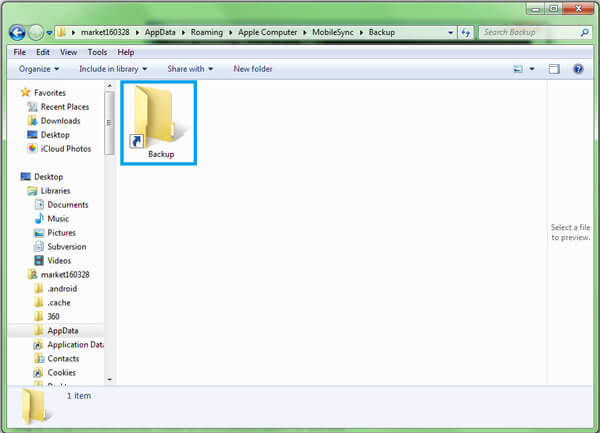
Step 4 Finally you can delete the old iTunes backup in the folder or you can remove the backup from iTunes "Edit" >"Preference" > "Device". Highlight the target iTunes backup, and then click "Delete Backup" button.

Step 1 Make sure you don't launch iTuens on your Mac. Find your Home folder, and navigate to /Library/Application Support/MobileSync/Backup/. Copy all backup files to your desired drive, like External drive.
Step 2 Launch Terminal (located at Applications/Utilities/Terminal) and open a command prompt. Create a symbolic link by using a command similar to the one below, "ln -s /Volumes/External/Backup/ ~/Library/Application Support/MobileSync/Backup".
Step 3 Use iTunes to backup your iPhone. Then, go to the new backup folder to see whether the backup file is there or not.
After you change the iTunes backup location, you could easily delete the original iTunes backup files. Learn here: How to delete backups on iTunes.
Though you can change or delete iTunes or iCloud backups on computer, however, you cannot view directly unless you use one certain software. In this part, we will recommend you a reputable and reliable iPhone data recovery, FoneLab to help you view and restore iPhone/iPad/iPod backups from iTunes and iCloud. First, download the program and have a try.
Step 1 Scan iTunes backup
Connect your iPhone with computer. Launch the program and choose "Recover from iTunes Backup File" mode and highlight the proper iTunes backup you want to view and restore. Then Click "Start Scan" to scan iTunes backup.
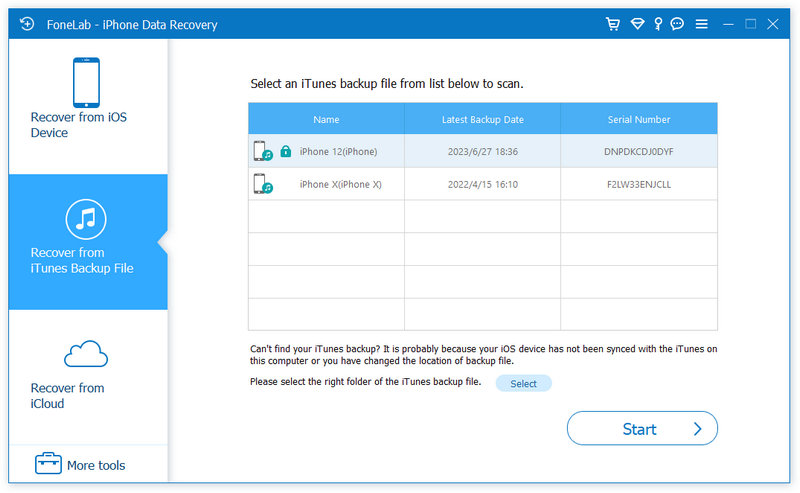
Step 2 View and restore iTunes backups
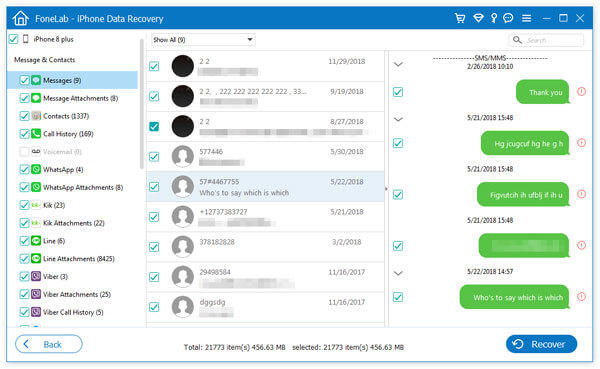
After the scanning process, all your iPhone data from iTunes backup will display. Taking message restore for an example, and click "Messages" from the left control and view all text messages on iTunes. From here, you are also enabled to check the deleted text messages as well.
Step 1 Scan iCloud backup
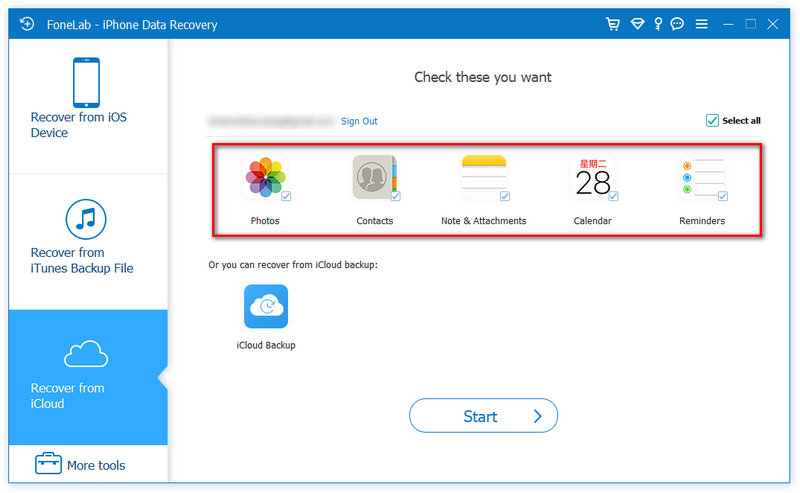
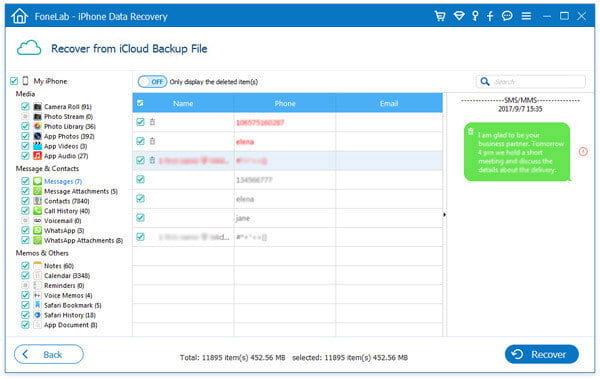
Select "Recover from iCloud Backup File" and log into iCloud with your Apple ID and password. Choose the way you want to scan.
If you want to recover data like contacts, photos, calendars, etc., you can just tick the box of the data types you need and coick "Start" to run a scan on iCloud.
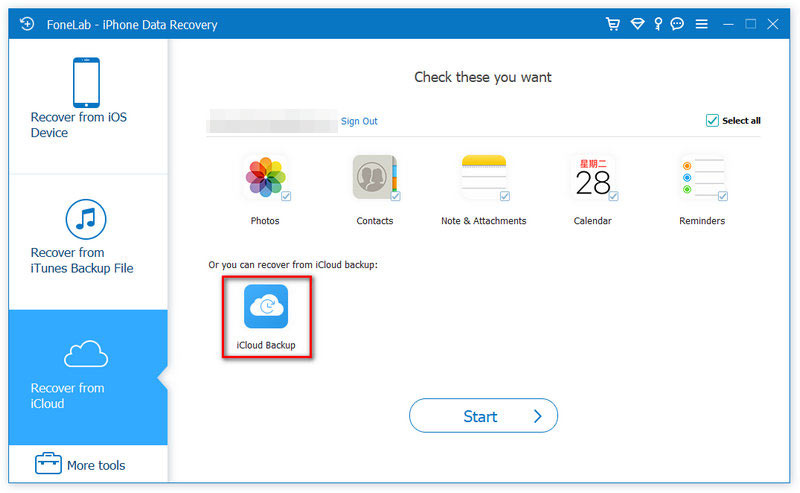
If you want to recover more data like app data, mesasges, etc., from iCloud, just choose "iCloud Backup".
Choose what you want to view and restore.
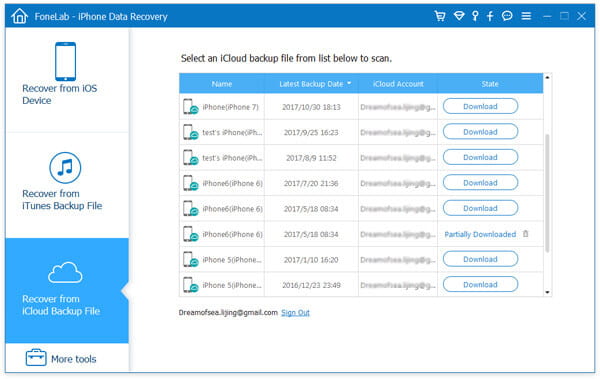
Step 2 View and restore iCloud backups
Take "Messages" as an example. Click "Messages" and then you can see all available messages from the main interface. Finally, click "Recover" button to restore iCloud backup files.
The whole steps can be checked by watching this video tutorial.

Have you managed to find where iPhone backups have been stored and how to change iPhone backup location? If you have other better ideas to change iPhone backup location, welcome to tell us.