It is of great importance for you to back up your iPhone for data saving. Many people choose to make iPhone backup to Apple's iCloud as iPhone files will be securely protected whenever there is a Wi-Fi network connection. However, iCloud has it disadvantage because it limitedly provides 5GB free storage. It is less than enough especially for those who have more than an iOS device that have all associated with one Apple ID. Fortunately, more useful iCloud tricks for iPhone backup are introduced in this article.
What can iCloud backup do for you? What data can iCloud back up or cannot backup exactly? Keep reading.
◆ Text Messages(SMS), MMS messages, iMessages (It needs SIM card to be in use during backup process)
◆ Visual Voicemail password (It needs SIM card to be in use during backup process)
◆ Purchase history for movies, music, TV shows, books and apps
◆ Photos and videos in the Camera Roll
◆ Device settings (Contacts, Mail, Calendar, Notes, Reminder, etc.)
◆ App data
◆ Ringtones
◆ Health data
◆ HomeKit configuration
◆ Media files synced from your PC or Mac won't be backed up, but these can be restored by syncing with iTunes.
◆ Items like Music/Movies/TV shows from iTunes Store, apps from App Store, or Books/Audiobooks from iBooks Store that have later removed after you purchase or download them.
You can manage to make iPhone backup on iCloud by following the step-by-step instructions.
No matter waht way you will adopt to back up iPhone, you need to sign in your iCloud account firstly. If you forgot iCloud password or account, then just recover it, then you can continue the following steps.
iCloud has the capability to let your iPhone data automatically be synced to iCloud as long as there is a Wi-Fi connection with your device.
Connect your iPhone to a Wi-Fi network.
Tap on "Settings" app, scroll the screen and choose "iCloud
For iOS 8 and later, enter iCloud tab, and scroll the screen and turn on "Backup". For iOS 7, go to "Storage & Backup" and then enable "Backup".
Connect your iPhone to WLAN or turn on Cellular Data.
Tap on "Settings" app, scroll the screen and choose "iCloud".
For iOS 8 and later, enter iCloud tab, and scroll the screen and tap "Back Up Now". For iOS 7, go to "Storage & Backup" and then choose "Backup Up Now".
Compared with iCloud, you could also use iTunes to backup iPhone files, like notes, photos, contacts, messages, etc. Take notes as the example, and learn How to backup iPhone notes to iTunes here.
Definitely, you have made iPhone backup to iCloud in case that you may accidentally delete or erase iPhone data. If iPhone files are unfortunately removed, and then you may need to restore iPhone from iCloud backup. And here, we'd like to recommend you to download the professional iPhone data recovery tool, Aiseesoft FoneLab to help you.
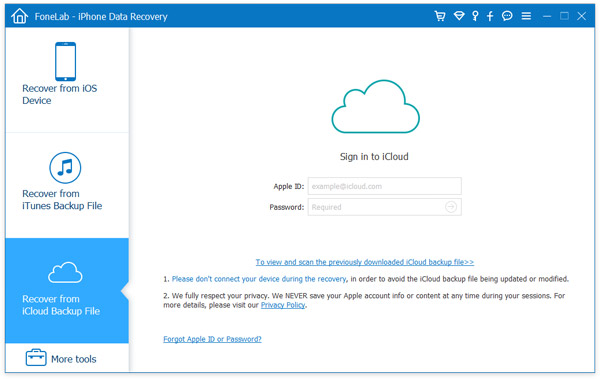
Step 1Choose "Recover from iCloud Backup File", and log in to iCloud.
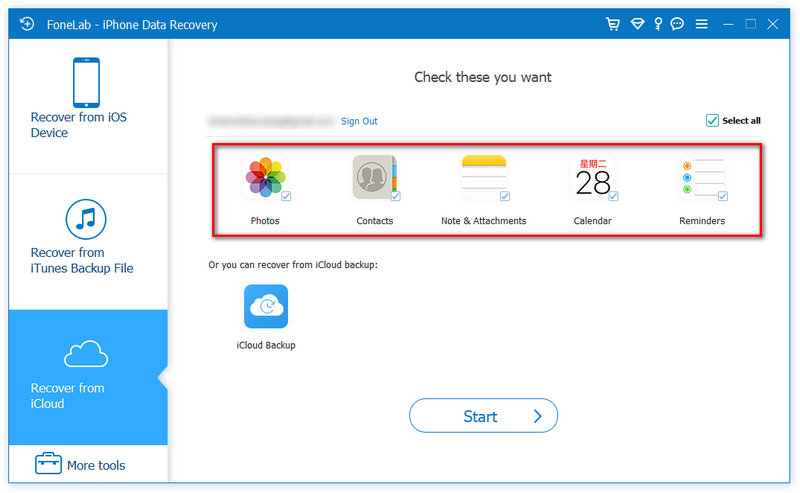
Then there are 2 ways to scan data from iCloud backup.
1. Select the data type you want to recover from iCloud like Contacts, Notes, Reminders, Photos, etc.
2. Another option left to you is to scan from "iCloud Backup".
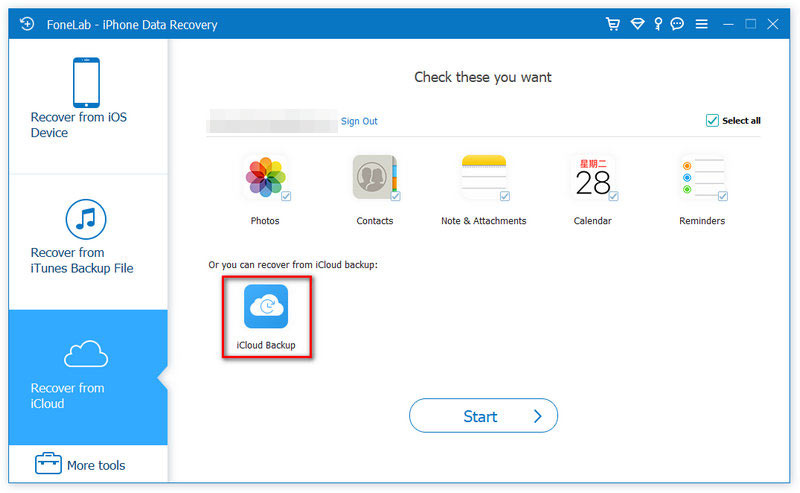
Then click "Start" to continue.
Step 2Download the proper iCloud backup file to scan the data.
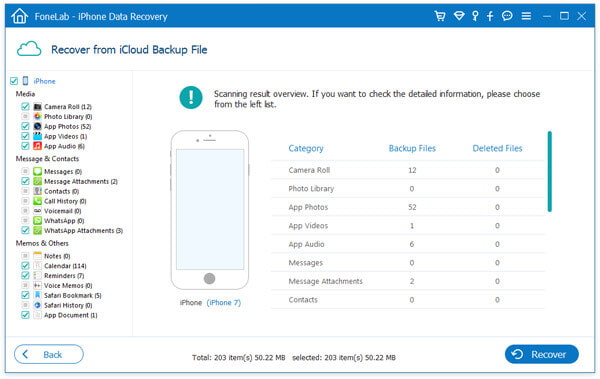
Step 3Click "Recover" after choosing the deleted iPhone files.
iCloud provides limited free storage. What you will do when iCloud storage is not enough. You can choose to clear iCloud backup to regain iCloud space, or you can purchase more storage, here are the iCloud storage pricing.
Here is a video to learn more:

Purchase more iCloud storage from iPhone
◆ 50GB: $ 0.99 a month
◆ 200GB: $ 2.99 a month
◆ 1TB: $ 9.99 a month
In this article, we mainly talk about how to back up phone to iCloud. Have you managed to make an iPhone backup on iCloud? Before you free up iCloud, you'd better download iCloud backup to PC.