Summary
Want to know how to empty trash on Mac? This article gives you three methods to help you empty Mac trash.
Summary
Want to know how to empty trash on Mac? This article gives you three methods to help you empty Mac trash.
Emptying all trash in your Mac's trash bin doesn't mean that you have them deleted completely. With powerful recovery software, there is still possibility to find them back. To better protect your privacy, you need to make sure that all trash on your Mac has been cleaned up for good.
Then, how to empty trash on Mac permanently? In the following post, I'll show you three common methods to securely empty trash on Mac. You can choose the method that suits you best.

How to Empty Trash on Mac
If want to empty trash on your Mac, the most efficient way is to use the third-party software. There is a lot of software in the market. Here below, we shall recommend you the most professional Mac Cleaner tool, which enables you to empty all trash on Mac with simple clicks. Besides, it also allows you to clean large/old files, delete duplicate files, remove unwanted apps, as well as monitor Mac performance.
Key Features:
Now free download this program and follow the steps below to empty trash on Mac quickly and permanently.
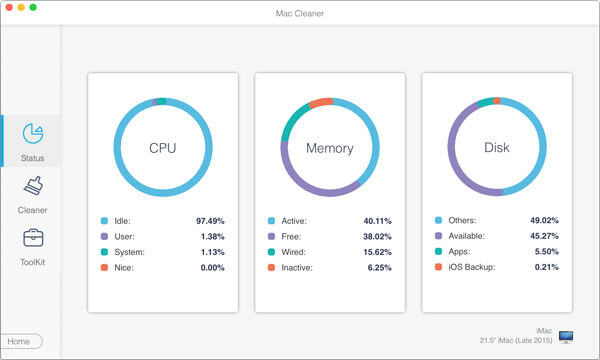
Step 1Download Mac Cleaner and launch the software. Mac Cleaner will detect the system status of your Mac, and you can see the details in the interface.
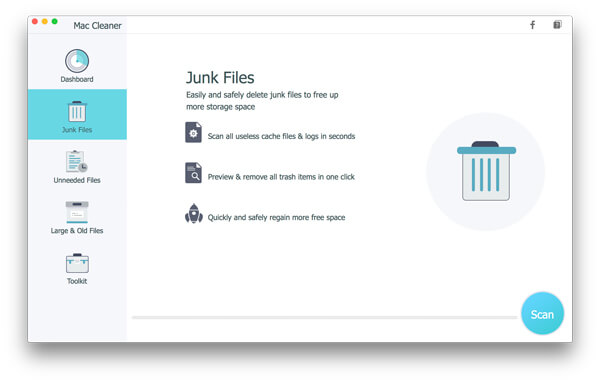
Step 2Choose "Junk Files" in the left panel, and then click the "Scan" button in the main window.
Step 3After the scanning process, you can see all junk files are listed, including "Trash bin". In order to empty trash on Mac, check the "Trash bin" option, then hit "Clean" button to start clear up all trash bin files.
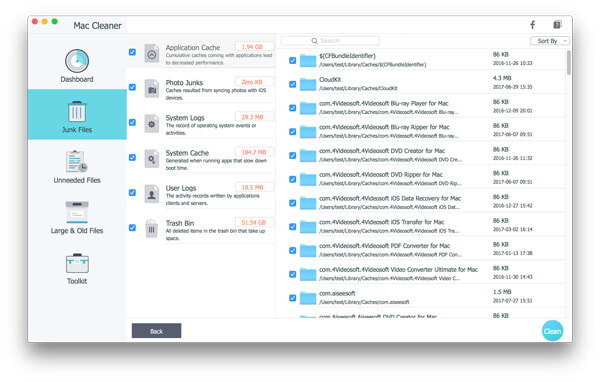
Wait for seconds, then you can see the trash emptied on Mac. You can also choose other options if you need to clean more junk files, such as "Application Cache", "Photo Junks", "System Logs", "User Logs", "Trash Bin", etc.
When you simply empty the Trash on Mac, the files and folders are not totally erased but still remain in your Mac. Apple has considered this, and provided a Secure Empty Trash option, which assists you to overwrite the deleted files, making it impossible to recover. Now let's see how to secure empty trash on Mac.
Note: Unfortunately, the Secure Empty Trash option is only available on OS X Yosemite and earlier. If you are using OS X El Capitan, jump to other methods.
Step 1Open Finder from your Launchpad, pull down "Finder" menu and choose "Secure Empty Trash" option.
Step 2A window pops up and asks if you want to permanently erase the items in Trash. Choose Secure Empty Trash to confirm it.
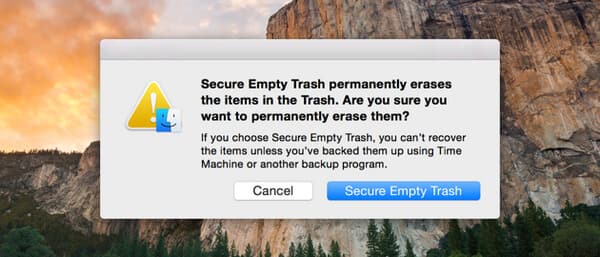
Step 3Wait for seconds, then the Trash will be emptied and overwritten.
What to do if Mac tells you that you can't empty trash? May an item is "still in use" even though you know it's not, or maybe an item is locked. Whatever the reason is, there is a way you can force empty trash on Mac.
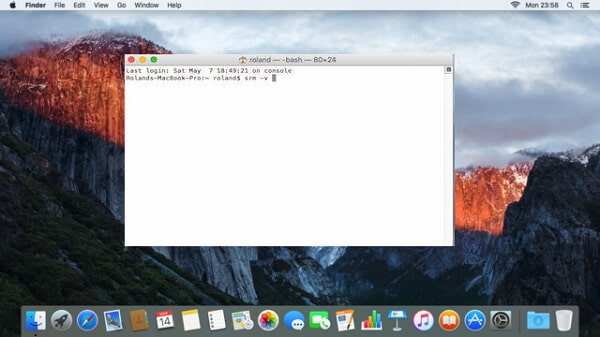
Step 1Go to "Finder" > "Applications" > "Utilities", find and open up Terminal.
Step 2Type the command: srm -v followed by a space. Please don't leave out the space.
Step 3Drag a file from Finder to the Terminal window, then hit Enter button. The file will be securely removed.
With the above methods, it is easy to secure empty trash or force empty trash on Mac. As you can see, the last two methods are complicated and limited to specific OS versions. While Mac Cleaner as a professional junk file cleaner tool has no limitation and works on all Mac devices and systems.
In this article, we have mainly showed you three methods to empty trash on Mac, you can use Secure Empty Trash option, or force empty Mac trash via Terminal. Moreover, we suggest you to consider Mac Cleaner – the one-click solution to empty trash on Mac. You'll be surprised how easy it can be.