Nowadays, it has become a common need to seamlessly access your media files across various devices within your home network. For instance, you want to display movies or TV shows stored on your Windows PC to a smart TV. The DLNA function provides a standardized solution for media streaming. In this article, I would like to talk about the DLNA Windows setup, explain what the DLNA is, and tell you how to turn your computer into a DLNA media server for remote playback.
DLNA, stands for Digital Living Network Alliance, is a set of guidelines or interoperability standards that allows compatible devices to stream media content under a local home network. DLNA-certified devices, such as smart TVs, game consoles, and music players, can share and communicate between each other, even from different manufacturers. DLNA lets connected devices access and play various media files.
When you speed up videos to 2X videos, you will only spend half of the time watching them. And because of its acceleration to the audio at the same time, you can make 2X videos to create funny voices and laughs. Besides, the frame rate of the 2X videos will also be increased, which will make them smoother. Thus, it's also an efficient way to fix the quality of low-fps videos.
Compared with the traditional cable connection, DLNA provides a more convenient way to stream your media library from one device to another. Moreover, this technology eliminates the need to transfer large files or juggle several storage devices.
DLNA adopts a standardized approach to ensure all compatible devices can easily each other and share all types of content. Many new smart devices are compatible with DLNA, including Windows 10/11 PCs, smart TVs, Sony and Microsoft gaming consoles, Blu-ray players, and more. In that case, you don’t need to worry about compatibility issues between different devices. Also, you don't need to buy some additional streaming devices or tools for media streaming, mirroring, or sharing.
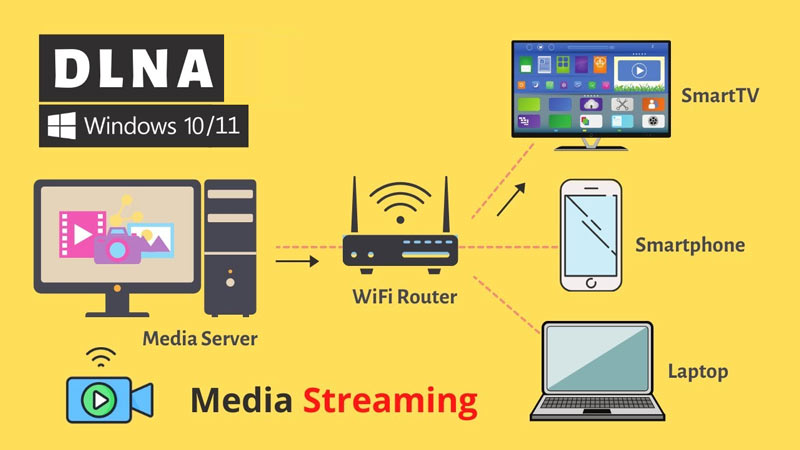
Both Windows 10 and 11 PCs have a built-in DLNA server. You don’t need to search for and install any additional media streaming software. This part tells how to set up DLNA on Windows for remote playback.
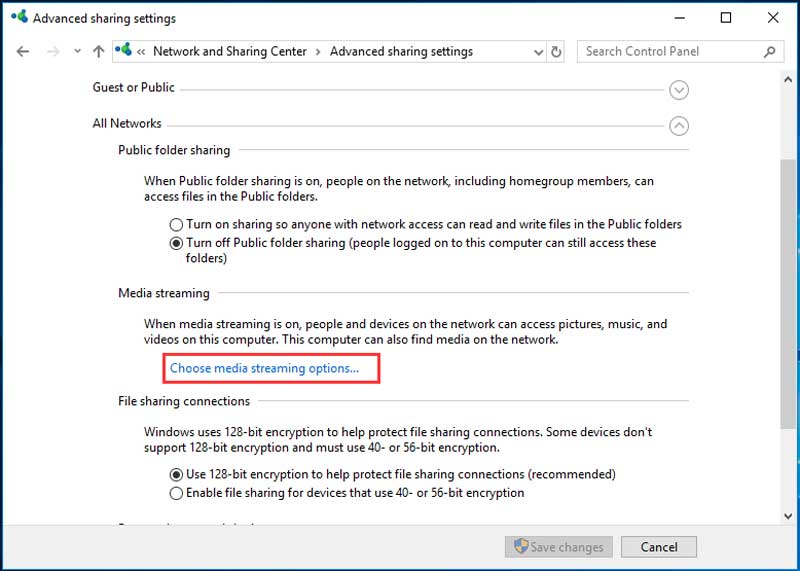
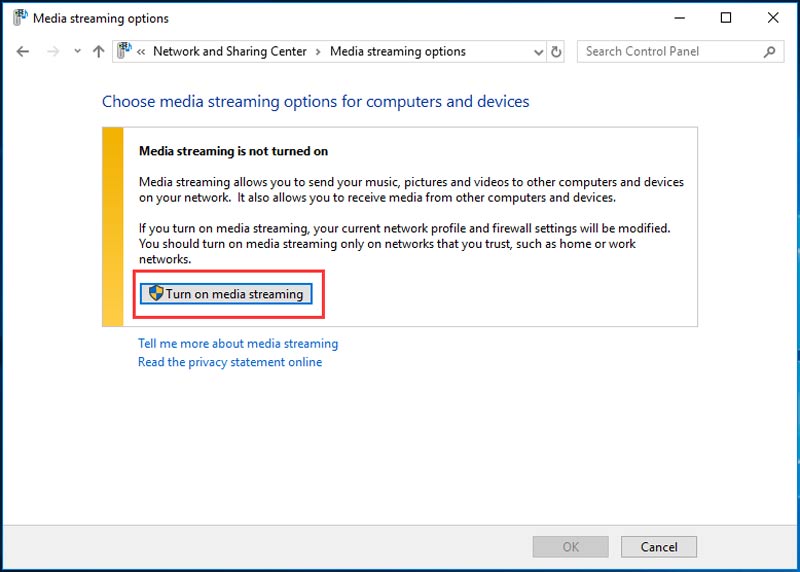
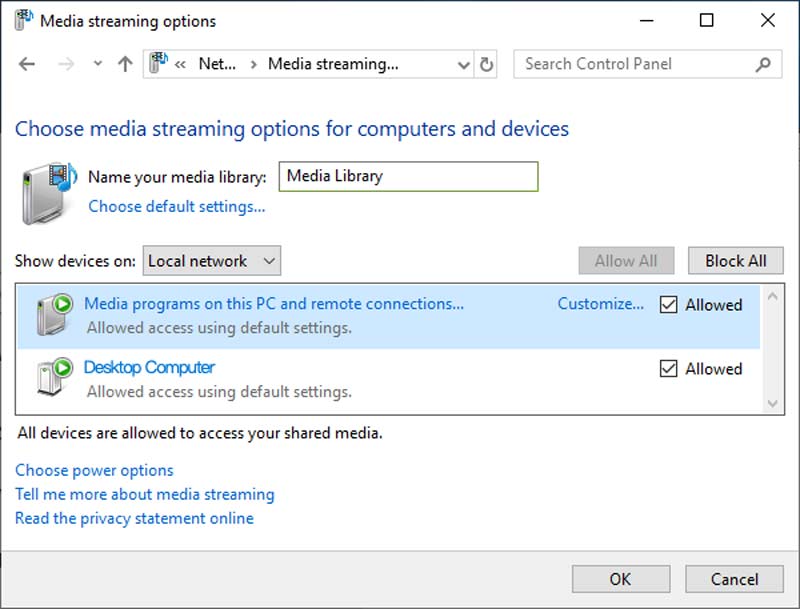
Once you have turned your Windows 10 or 11 PC into a DLNA media server, you can directly access its media files on other compatible DLNA devices. Sometimes, the firewall on your Windows PC might block DLNA media streaming. You can temporarily disable it to allow media streaming exceptions.
When you want to stream videos from your computer to a smart TV, besides DLNA, you can also rely on the screen mirroring functions in VLC Media Play or Roku devices.
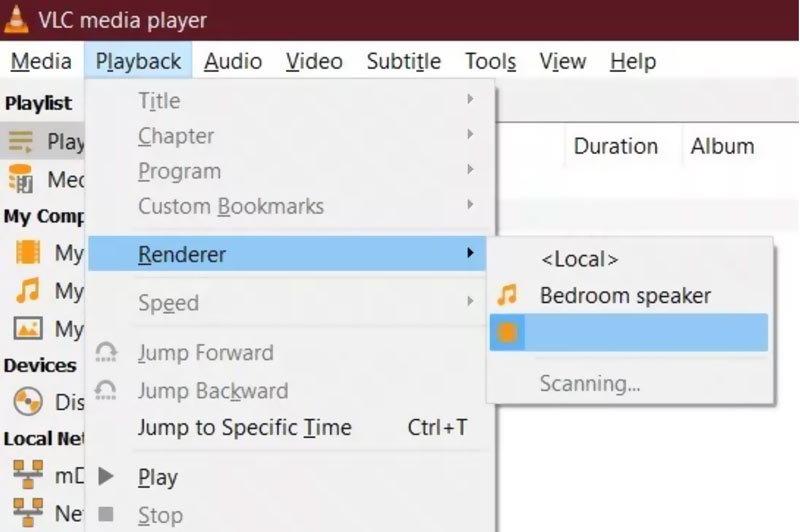
As a free and popular media player, VLC carries a built-in render option that allows you to cast content to a Chromecast device. Make sure your computer and the Chromecast device are connected to the same Wi-Fi network. While playing a video in VLC, you can click the top Playback menu and choose Render from its dropdown. From available devices, select the Chromecast device for casting. Click here to get VLC Media Player alternatives.
Roku has a free media player app called Roku Media Player that enables you to stream videos, songs, and photos from your Windows PC or Mac to a Roku device. You can install and open the app, scan all the compatible devices, find and choose your Roku device, and then make the connection and set it up. Once connected, you can use Roku Media Player to browse your computer's media library and play files.
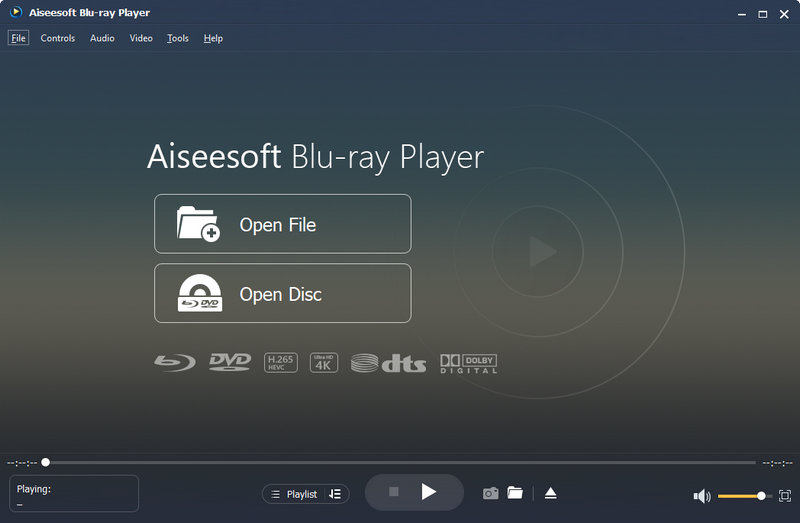
To directly view high-resolution Blu-ray or 4K videos on your computer smoothly, you can try using the famous Aiseesoft Blu-ray Player. It supports all commonly used video formats and disc types. It uses the latest acceleration technology to guarantee a fantastic viewing experience.
100% Secure. No Ads.
100% Secure. No Ads.
Does Windows 10 have DLNA?
Yes, Windows 10 supports DLNA 1.5 (Digital Living Network Alliance) natively. You can set up your PC as a DLNA server and connect it to other DLNA-compatible devices for sharing and streaming various media files, such as pictures, songs, and videos. However, in recent Windows 10 updates, Microsoft has somewhat downplayed DLNA functionality.
How do I enable DLNA on Windows 11?
To turn on DLNA on Windows 11, you can click the Start menu and then go to the Control Panel. Set the view by to Category in the upper-right corner of the Control Panel window. Locate the Network and Internet and click it. Then, enter the Network and Sharing Center. Click Media streaming options on the left panel and hit Turn on media streaming. Now, you have enabled the built-in DLNA media server on your Windows 11 PC. You can click Customize to adjust more settings like the media library location, device permissions, and more.
How do I connect my DLNA device to my computer?
To connect your DLNA device to your computer, you should put both devices under the same Wi-Fi network. Also, you need to ensure they are DLNA compatible. Set up and turn on a DLNA media server on your computer. You can either use the built-in media streaming option in Windows 10/11 PC or a third-party media server app. After that, you can handily access the DLNA server from your DLNA device.
Conclusion
I hope you can learn more about DLNA Windows setup after reading this post. Follow the guide to turn on DLNA on your Windows 11 or 10 PC and start media streaming easily.
Adjust Video Speed
Increase MP4 Volume Speed up Video on Windows/Mac 2x Video Speed up Video Online Speed up Up Mp4 Slow down Down MP4 Video Speed Controller Speed up Video on iPhone
Blu-ray Player is a powerful player that can play Blu-ray disc, Blu-ray folder, DVD disc/folder/ISO file, acting as common media player for any HD/SD video files.
100% Secure. No Ads.
100% Secure. No Ads.