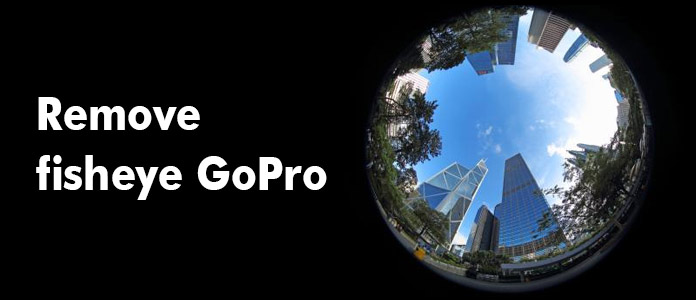
In today's article, we are going to talk about an interesting topic – remove fisheye from GoPro.
As we all know, GoPro cameras are famous for their wide-angle fisheye look. It brings you a large field of view (FOV), giving you a sense of immersion. If that's what you are looking for, you'll be amused. However, the fisheye look isn't always what you want. In some situations, the fisheye effect would be a strong disturbance for images/videos as the straight lines become bent and from central location frames gets oversized. In that case, it would be better for us to remove fisheye distortion.
Then, how to remove GoPro fisheye lens? In the following article, we'll give you the tutorials to remove fisheye distortion from GoPro videos and photos.
Remove Fisheye from GoPro
For videos, GoPro Studio includes a "remove fisheye" option that's baked in as part of the process of converting the footage. You can remove the fisheye effect to apply a "lens adjustment" to the converted GoPro CineForm file giving it a smaller FOV. Here's how you do it:
Step 1Open GoPro Studio. In "View & Trim" section, select your GoPro clip and click Advanced Settings.
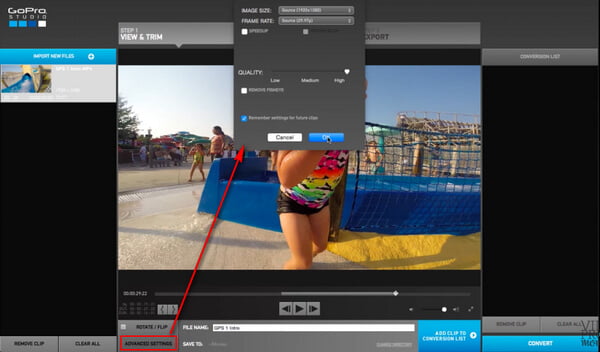
Note: Be aware that file must come from a GoPro camera with the original file naming convention.
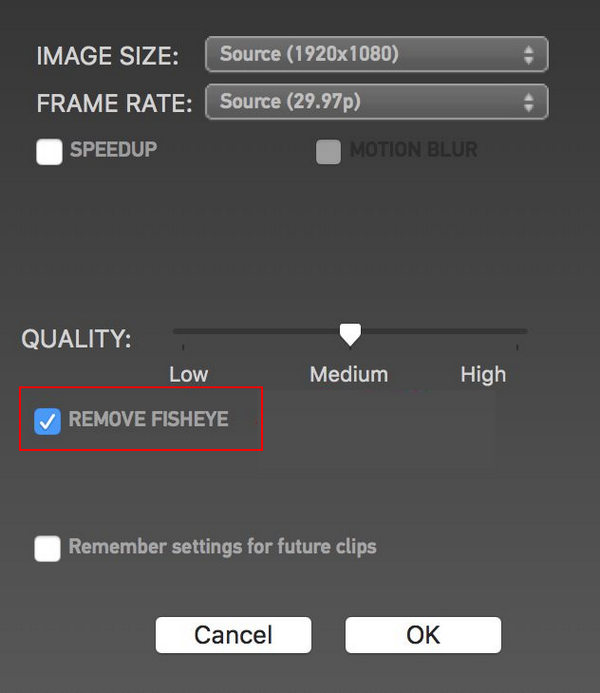
Step 2In "Advanced Settings" windows, check the Remove Fisheye option, then click "OK".
Step 3Add the clip to the "Conversion List" and then convert it. The fisheye effect will be removed. You can continue to the video editing section and check the final fisheye-removal video.
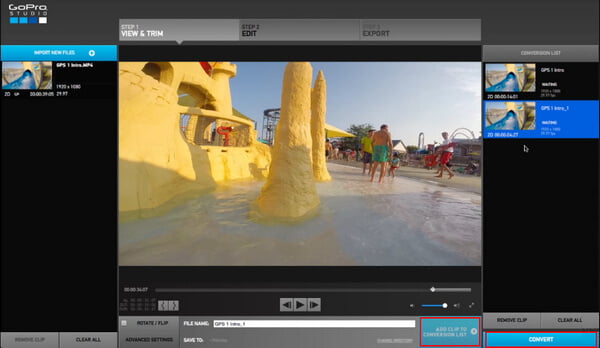
Tip: You need to know that the "Remove Fisheye Effect" will not work for GoPro HERO5 Cameras. The appropriate workaround is to use the Linear FOV mode, which comes with GoPro Hero 5 as a new feature.
You can have the fisheye lens correction for still images in Photoshop, Lightroom, Adobe Premiere Pro, etc. Here I would like to take Lightroom as an example, and show you how to correct the fisheye distortion in GoPro photos. You can find the similar function in other video editing software I mentioned above.
Step 1Open Lightroom, go to Develop Module, and select the image you want to remove fisheye from. In the panels at the right, scroll down to the Lens Corrections panel.
Step 2Under "Lens Correction" section, check Enable Profile Corrections, it should automatically detect the camera "Make" and "Model" from the image metadata.
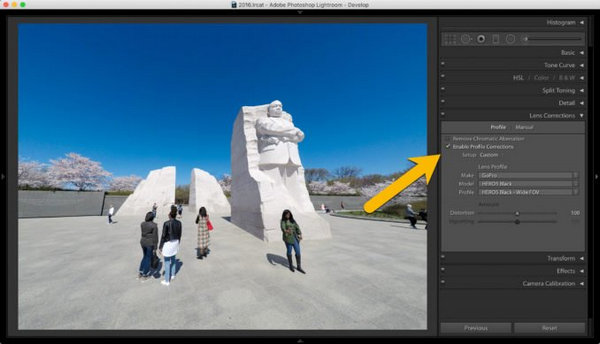
Step 3Choose the profile you want to correct, such as "Linear FOV", "Medium FOV", "Narrow FOV", etc.
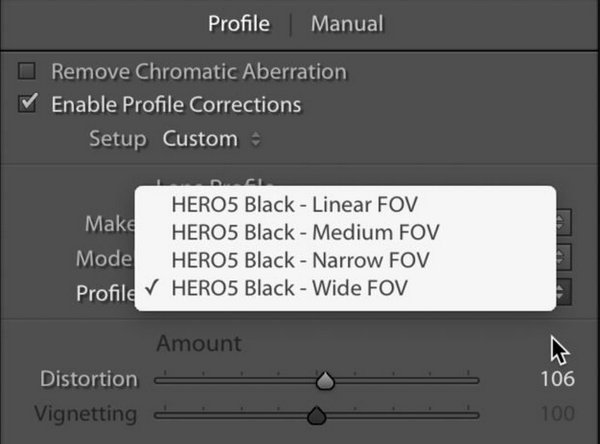
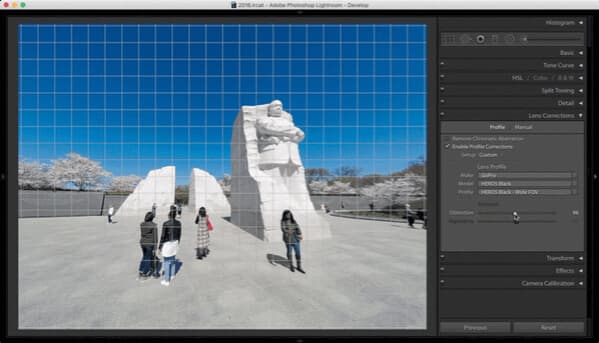
Step 4Adjust distortion amount to remove GoPro fisheye. You can use the slider that starts in the middle at 100. To apply less correction, slide it to the left until you're happy with the effect.
Although there are many professional video or image editing tools like GoPro Studio, Adobe Premier and Final Cut Pro etc. that can assist in fish eye correction, most of them have complicated user interface and are difficult to operate. Here we recommend you one simple yet powerful video editing software, which could helps you remove fisheye in GoPro with simple clicks.
In this article, we have mianly showed you how to remove fisheye effect from GoPro. Still have more questions about GoPro fisheye? Feel free to leave your comments down below.
GoPro studio is basically complete video editing software that enables you to create GoPro videos and apply stunning video effects. In this part, we are going to explain how to use GoPro studio step by step. Before we get started, make sure you have downloaded the latest version GoPro Studio on your PC or Mac.
Open GoPro Studio, and you'll see the blue button labeled as "Import New Files" on the left panel. Click on it, and then select the video files that you want to include.
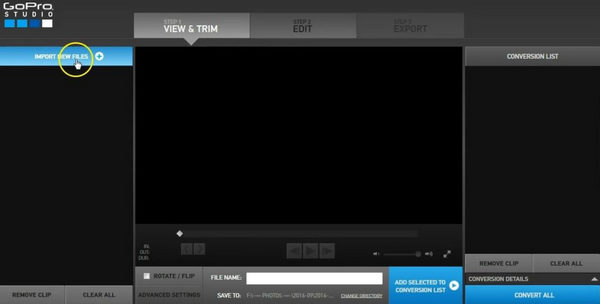
After you have imported the GoPro videos, you might find lots of useless raw footage you don't want to use for the final version of the video. In that case, you can do a rough trimming or cutting before the actual editing.
Choose the thumbnail of a video and then click on the "Play" button. There are two trimming buttons on the bottom left of the window that you can use trim out the front or back part.
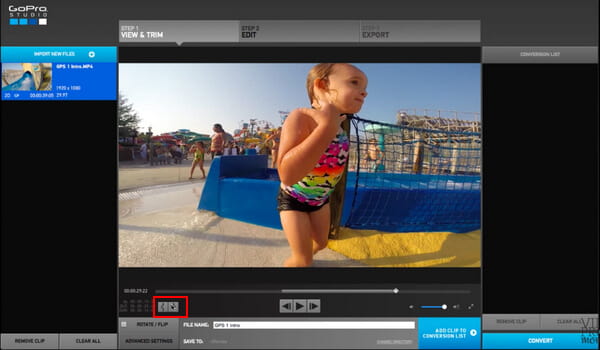
If you want to change any setting like frames per second, size of the video, change format, increasing speed or any other setting; you can go to advanced settings and make the changes. These settings determine how your raw your video files will be converted.

To start with editing, you need to convert all video files into one. In order to do that, select the clip and choose to "Add Clip to Conversion List". Once you have added all the clips to conversion list, convert them by clicking on "Convert All" button. Then you can enter the video editing.
In this step, you are can also add the new videos, trim/rotate/flip videos as you want. After the conversion process, click on "Proceed to Step 2" button which is replaced from "Convert All" button. This will take you to the video editing mode.

GoPro Studio offers you 2 options in the next screen: create a new video, or use one of the templates in the video editing software.
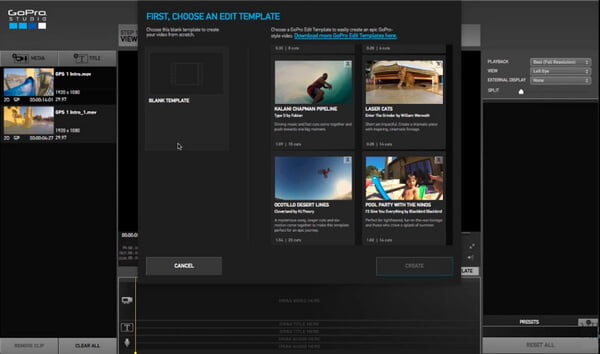
If you choose the template option, all you have to do is replace the videos with your files.
For creating the new video, click on "Blank" button on the left hand side and then on "create" on the bottom right. Now, click on the "Title" button and type the title name that you want. You can also change the font size, color and some other features of the title.
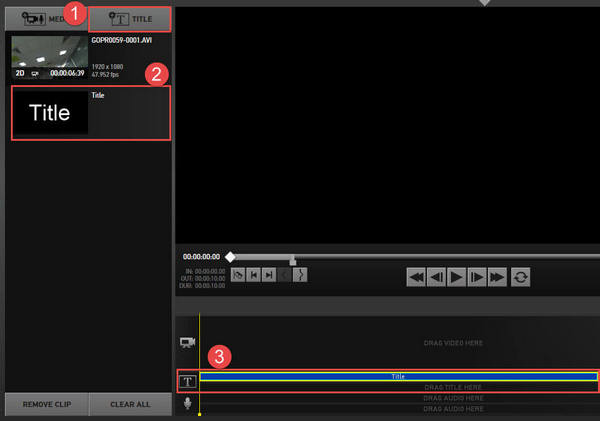
Select the video you want to import, drag and drop it to the timeline. In the right column, you can adjust the speed, fade time, brightness, volume level, add video transitions or slow motion effects, split video, etc.
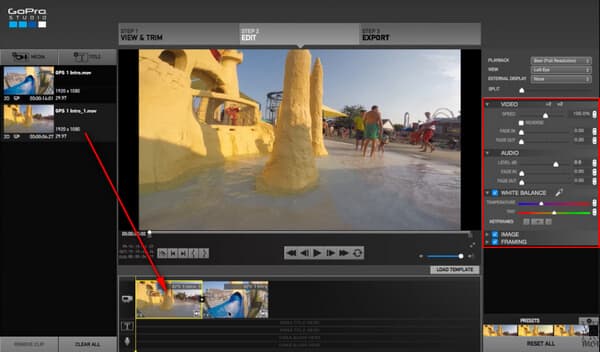
You can add some music to your GoPro video if you want. Click "Media" button in the top left and then select the music you want to import. Then, drag the audio file into the timeline, where you see "Drag your title" here.
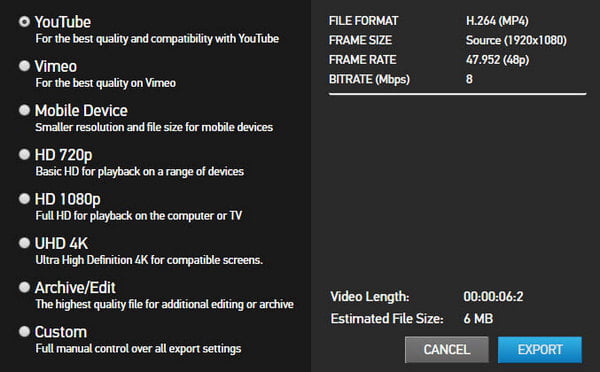
After finishing the editing, you can export the video to the format you want. GoPro Studio provides you many ways to export your video file. You can directly upload it or save it for watching later on your PC or set other parameters by choosing the custom options. After selecting the particular option, click on the "Export" button.
As you can see, GoPro Studio is a simple and basic video editing for your GoPro videos. If you are looking for a more advanced GoPro Studio video editing software alternative with powerful features, you can try Video Converter Ultimate. It allows you to convert/edit/merge/cut your action camera videos within clicks.
In this article, we have mianly showed you how to use GoPro Studio. Still have more questions about this GoPro Studio tutorial? Feel free to leave your comments down below.
