
Ezvid is a full-featured video editor and screen recorder which is used to create millions of videos for user-generated content websites. Many users use this proprietary video creation software to create some of the most entertaining and informative non-fiction video guides on the internet with its cutting-edge effects and features including voice recording, facecam, voice synthesis, screen drawing and speed control. Just with one click, you can record your screen with Ezvid and capture whatever appears on your computer screen. Moreover, you can edit your video and save if or directly upload to YouTube. It is really very easy to use.
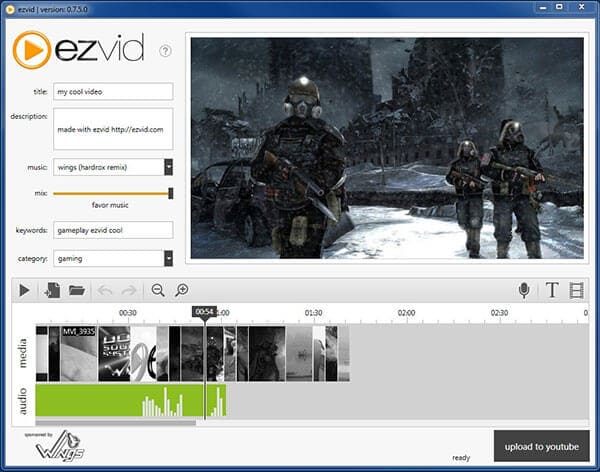
Ezvid is a great little screen recorder for work projects and software tutorials with excellent text to speech tool and built-in editor. It is very easy to use with quick keyboard shortcuts for hands-free recording and simplified graphical interface. However, it is unable to save recordings to your PC as it can only export recordings to YouTube. Moreover, it can also record for up to 45 minutes at a stretch.
Pros:
Cons:
You can easily download Wax from its official website ezvid.com for the latest version or you can also download it from other download sites. Here are some requirements for your computer you need to know before downloading Ezvid:
If you are using Mac, you may not be able to download Ezvid, so just read this requirement before downloading.
Ezvid is considered to be a freeware HD video maker, slideshow maker, screen recorder and movie maker. You can easily use it to import images and video and upload directly to YouTube. Learn the key features of Ezvid before learning how to use it.
Screen recording: one of the most easy-to-use screen recorder and screen capture for Windows;
Speech synthesis: make amazing computer narration for you video;
YouTube upload: easily upload your videos to YouTube with 1280×720 resolution with optimized for crystal clear display;
Crop and edit video, record audio, add images, text and automatic animation effects;
Automatic audio normalization and ducking;
No registration and 100% Spyware and Adware free.
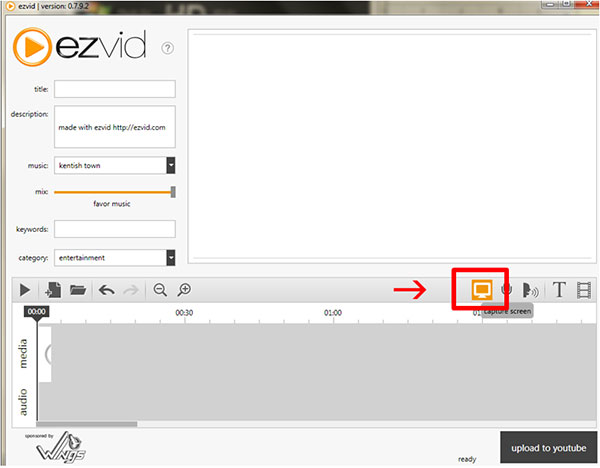
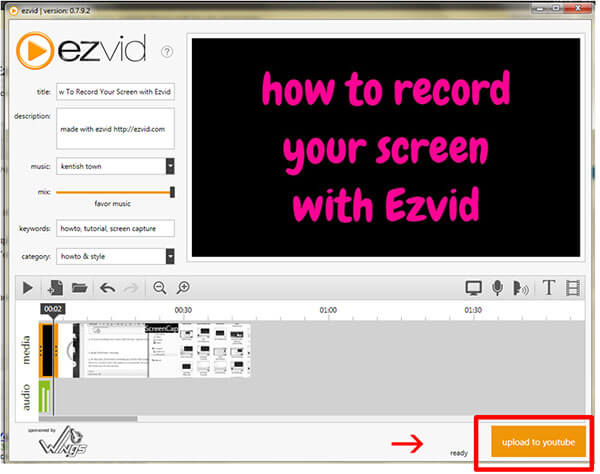
Step 1Download and install Ezvid and launch it on your computer. Click "capture screen" icon on the right side below to start recording your screen. It will capture the whole area of your monitor. Then you can stop recording by clicking "stop" icon or click "x" to cancel recording. Of course, you can also directly drag the videos to the program without recording.
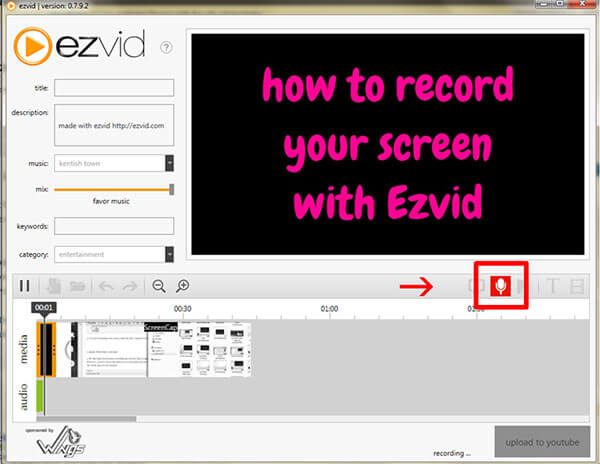
Step 2After stop recording, the recorded video will be automatically adjusted the record duration of the length on its timeline. If you need to add a commentary footage to your video, you can click "record voice" icon.
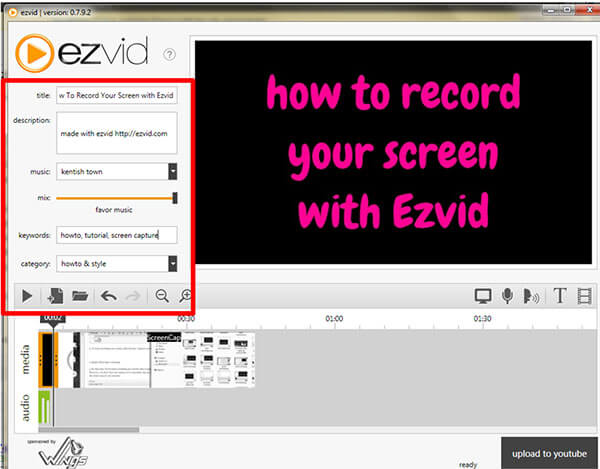
Step 3You can add background music to your video from the list of songs on the left sidebar. You can also trim your video directly on timeline. Besides, cropping video and add text and images are also supported. If you plan to upload to YouTube, you can add title, description and keywords to your video.
Step 4After editing, you can preview the video by click "play" button. And then, click "upload to YouTube" to upload your video to YouTube. You need to login your YouTube account and wait while the video being rendered and processed. Once the upload is finished, you will see a message to let you know uploading finished.
Ezvid may be mainly used as screen recorder rather than video editor. And as its limitation of only saving video to YouTube and not supporting Mac OS X. Here we would like to introduce you a more completed video editing software - Free Video Editor to help you easily rotate, clip, crop, watermark and convert video and audio files on your Windows and Mac. Learn how to use this free video editor to edit videos easily on both Windows and Mac.
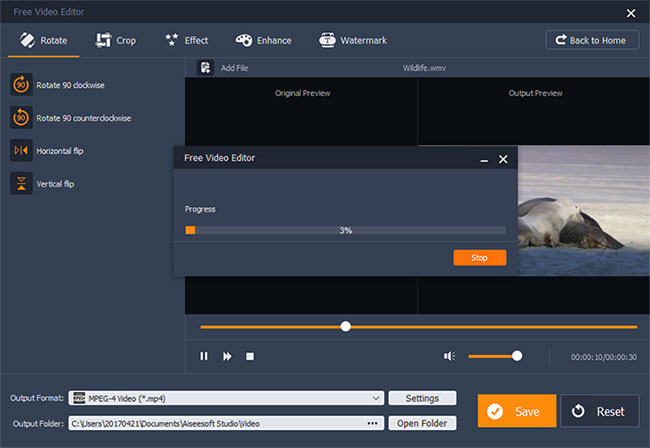
Step 1Download and install this free video editing software on your computer, If you are using Mac, just download the Mac version. Choose any editing function on the main interface to enter the edit window. You can easily switch to other specific editing tools on the top toolbar without going back to the main interface.

Step 2If you want to split your video, you can choose "Basic Clip" or "Advanced Clip" on the main interface as it is the function separated from other editing features. Click "Add File" button to add your video to this program. You can split your video by entering the exact start and end time or click "Split" button to split the video from the moment the playing button on. All the split files are listed on the drop down list. You can also crop, enhance, add effect and watermark to your video by switching to this function interface and continue edit the same video.
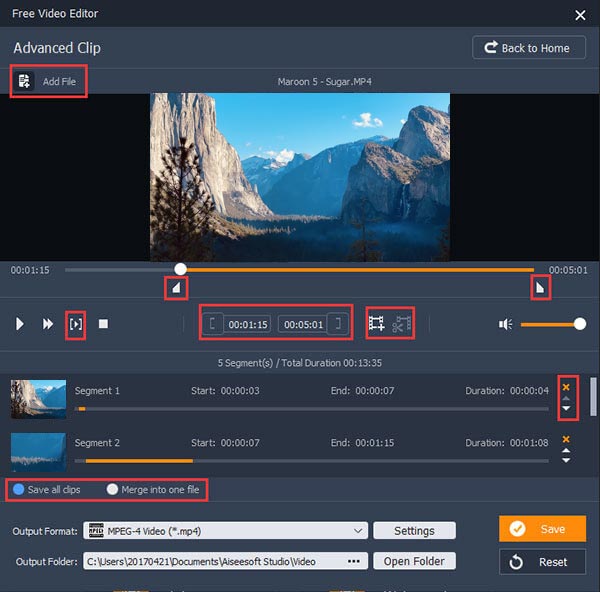
Step 3After editing, click "Save" button to save your edited video. It will take a few minutes to save the file. After saving, click "Open Output Folder" and you can check your edited video on your computer directly.
You can also check the following video tutorial for quick understanding:

In this article, we generally introduce Ezvid video editing software and how to use it to edit your videos. And we also offer an alternative to Ezvid. Hope you can edit your videos easily with this free video editing tools. For more recommendation, you can also leave your comments below.