
As people always say, sound is half the experience to a movie. Especially when you are making a tutorial video, the voiceover becomes extremely important. Coming to this respect, iMovie gives you the best method. With iMovie, you can add multiple sound effects and background music to your movies, or you can record voiceover on your own. Moreover, the iMovie voiceover can edited separately in its own area of the timeline, and is unaffected by edits made to other clips.
Then how to do a voiceover in iMovie? In the following article, I'll teach you how to record a voiceover in iMovie. Meanwhile, if you run into "iMovie won't record voice over" or such issues, you can also find solutions in the article.

Do a Voiceover On iMovie
You can easily use iMovie for Mac to record your own narration to add to your movie. Now I'll take iMovie 10 as an example.
Step 1 Load video clip
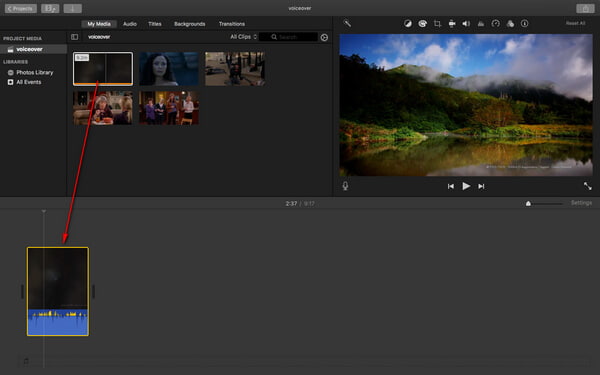
Open iMovie, load the video you want to edit in the project, and drag it down the timeline.
Step 2 Choose Voiceover button
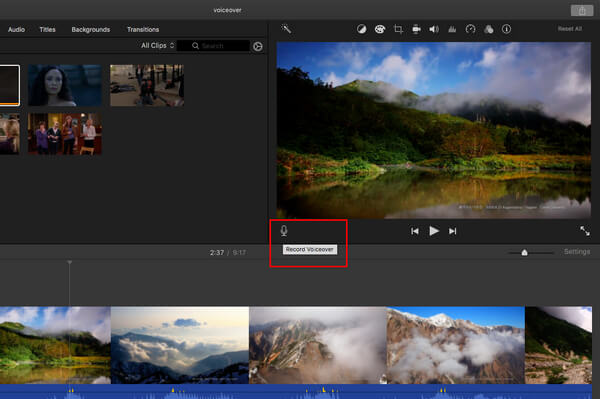
Position the playhead where you want to start recording voiceover in the timeline, and click the Record Voiceover button below the viewer.
Step 3 Adjust voiceover recording settings
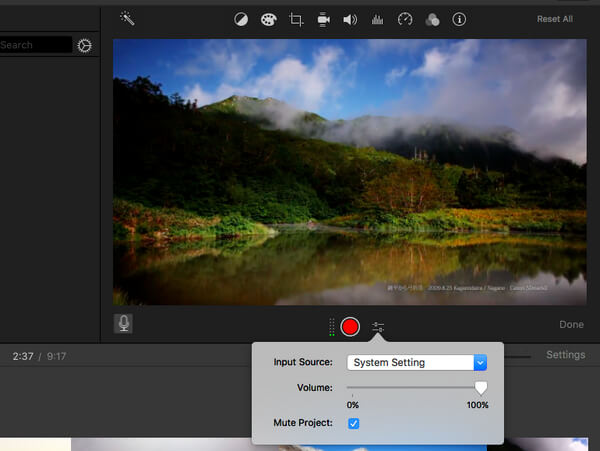
Before you do a voiceover in iMovie, click the Voiceover options button to adjust the recording settings according to your needs. Here you can change the input device, adjust the input level of the microphone, and mute sound from other clips while recording.
Step 4 Record voiceover in iMovie
With everything set, click the Record button to start doing the voiceover in iMovie. Whenever you want to stop recording, click the Record button again. The recorded audio will be added as a new clip in the timeline, above the background music. The voiceover clip is attached to the clip that was below the playhead when the recording was started.
When you're finished, click Done to the right of the voiceover recording controls.


Not only could you add a voiceover in iMovie for Mac, you can also record a voiceover if you are using iMovie for iPad or iPhone. Here I'll take iPad as an example, and show you how to voiceover in iMovie.
Step 1 Open iMovie on your iPad/iPhone. Click the "Projects" tab on top, and then "Create Project" to load the video clip you want to edit.
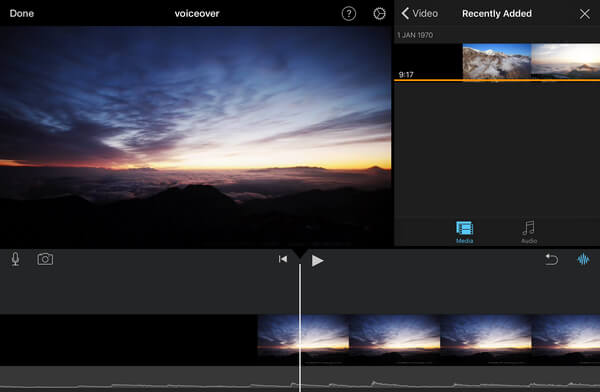
Step 2 In the timeline, drag left or right over the video clip so that the playhead line is positioned wherever you want the voiceover to start. Click microphone icon on the left, and tap on "Voiceover" option.
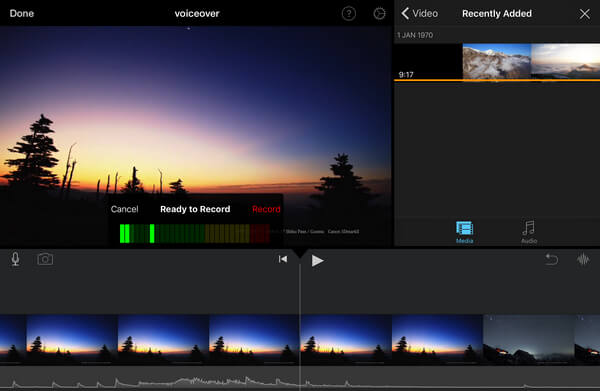
Step 3 Now you'll see a "Ready to Record" box above timeline. Click "Record to start to record voice in iMovie, and click "Stop" to stop recording. When the recording finished, you can choose to cancel, retake, review or accept the voiceover as you want.
Although it is not difficult at all to voice over in iMovie, I've learned that many people have run into situations when voiceover in iMovie is not working. When that happens, I suggest you to change better voiceover tool. Here I would like to recommend you the best video editing tool, which helps you record voiceover in a better way.
In this article, I have mainly showed you how to do a voiceover in iMovie, whether it's on Mac or iPhone/iPad. Still have more questions about iMovie voiceover? Feel free to leave your comments down below.